
Preheat and zone your grill
Good texture comes from matching the cooking cue to the food, not from trusting the timer alone. Check thickness, moisture, and doneness before changing the recipe.
-
Prep evenlyCut, roll, portion, or spread the mixture evenly so every piece cooks at the same pace.
-
Control moisturePat, drain, rest, or reduce wet ingredients when excess liquid would soften the final texture.
-
Use the doneness cueLook for the recipe-specific sign of doneness instead of stopping at the first browned edge.
-
Let it settleCool or rest the finished food long enough for steam and structure to stabilize.
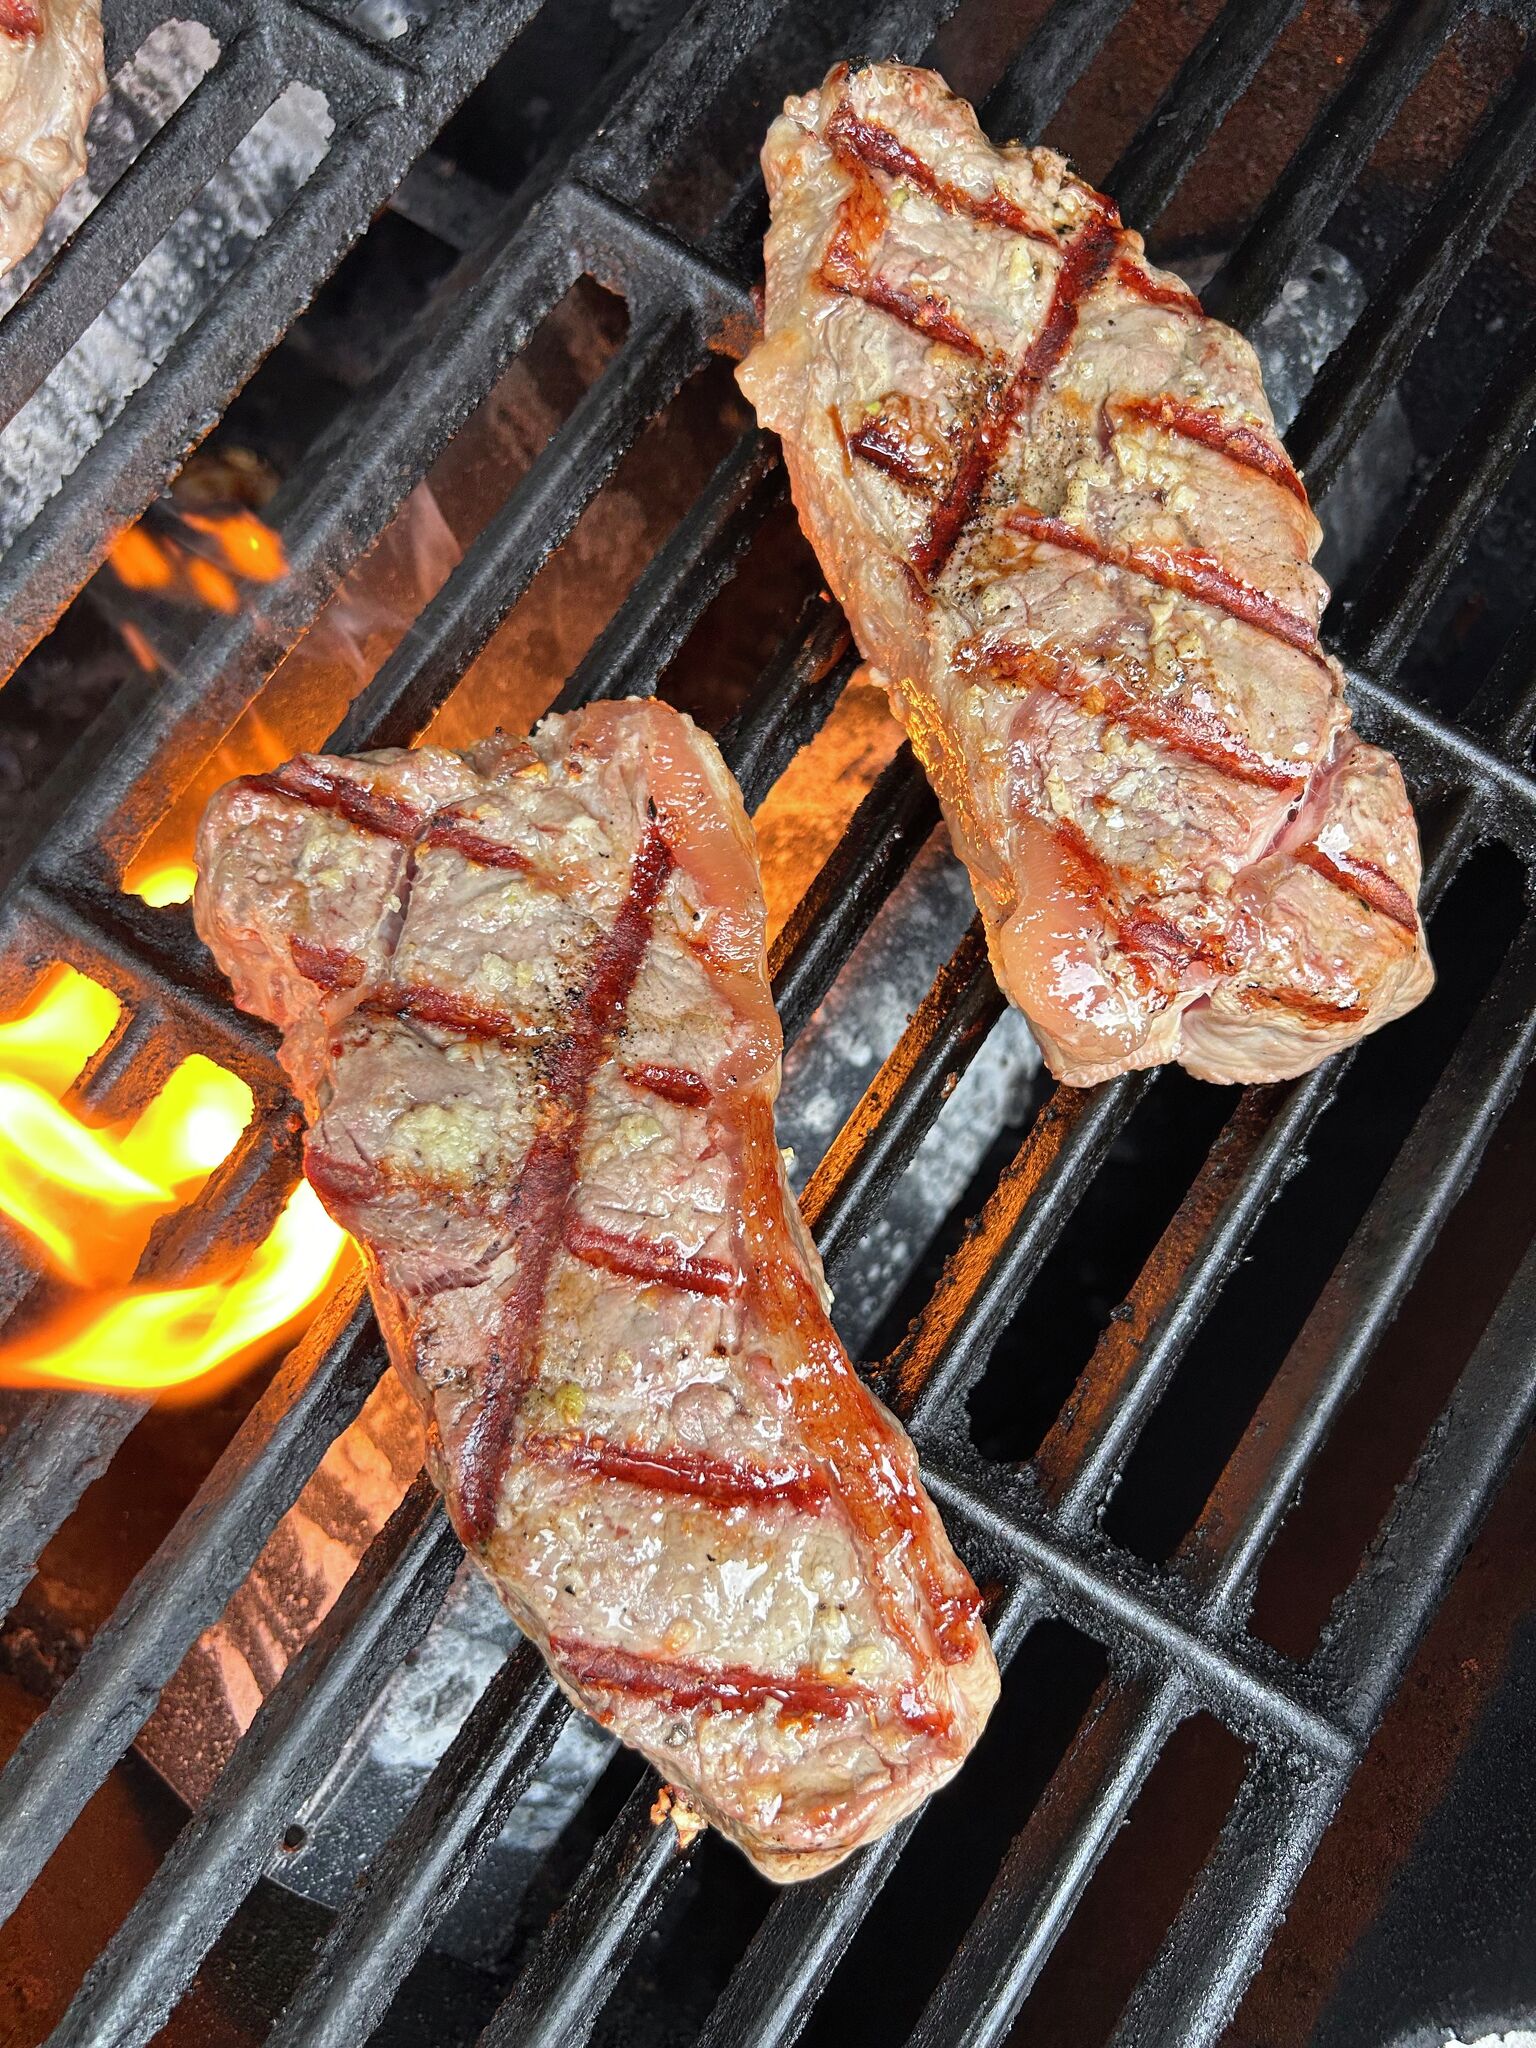
Sear and finish the filet mignon
Good texture comes from matching the cooking cue to the food, not from trusting the timer alone. Check thickness, moisture, and doneness before changing the recipe.
-
Prep evenlyCut, roll, portion, or spread the mixture evenly so every piece cooks at the same pace.
-
Control moisturePat, drain, rest, or reduce wet ingredients when excess liquid would soften the final texture.
-
Use the doneness cueLook for the recipe-specific sign of doneness instead of stopping at the first browned edge.
-
Let it settleCool or rest the finished food long enough for steam and structure to stabilize.
Grill burgers without drying them out
The biggest mistake people make with burgers is treating them like steak. You want a hot, crispy crust on the outside and a juicy, pink interior. To get there, you need high heat and a light hand.
Clean your grates thoroughly, then crank the grill to high. Wait until you see smoke rising from the metal. This ensures the fat renders immediately rather than pooling and steaming the meat. A clean, hot surface prevents sticking and creates that essential Maillard reaction crust.
Handle the ground beef as little as possible. Overworking the meat makes the texture dense and rubbery. Form loose balls and flatten them gently into discs. Press a shallow thumbprint into the center of each patty. This counteracts the tendency of the meat to puff up in the middle as it cooks, keeping the burger flat and even.

Place the patties on the grates and leave them alone. Do not press down with your spatula. Pressing squeezes out the flavorful juices, leaving you with a dry, crumbly burger. Let the heat do the work. You will know they are ready to flip when you see juices collecting on the top surface and the edges turn brown.
Flip the burgers only once. Cook the second side for a few minutes less than the first. Use an instant-read thermometer to check for doneness: 160°F (71°C) for well-done or 155°F (68°C) for medium. Pull the burgers off the heat just before they hit the target temperature; carryover cooking will finish the job.
Let the burgers rest for three minutes after grilling. This allows the juices to redistribute throughout the meat rather than running out onto the plate when you take a bite. Serve immediately on toasted buns.
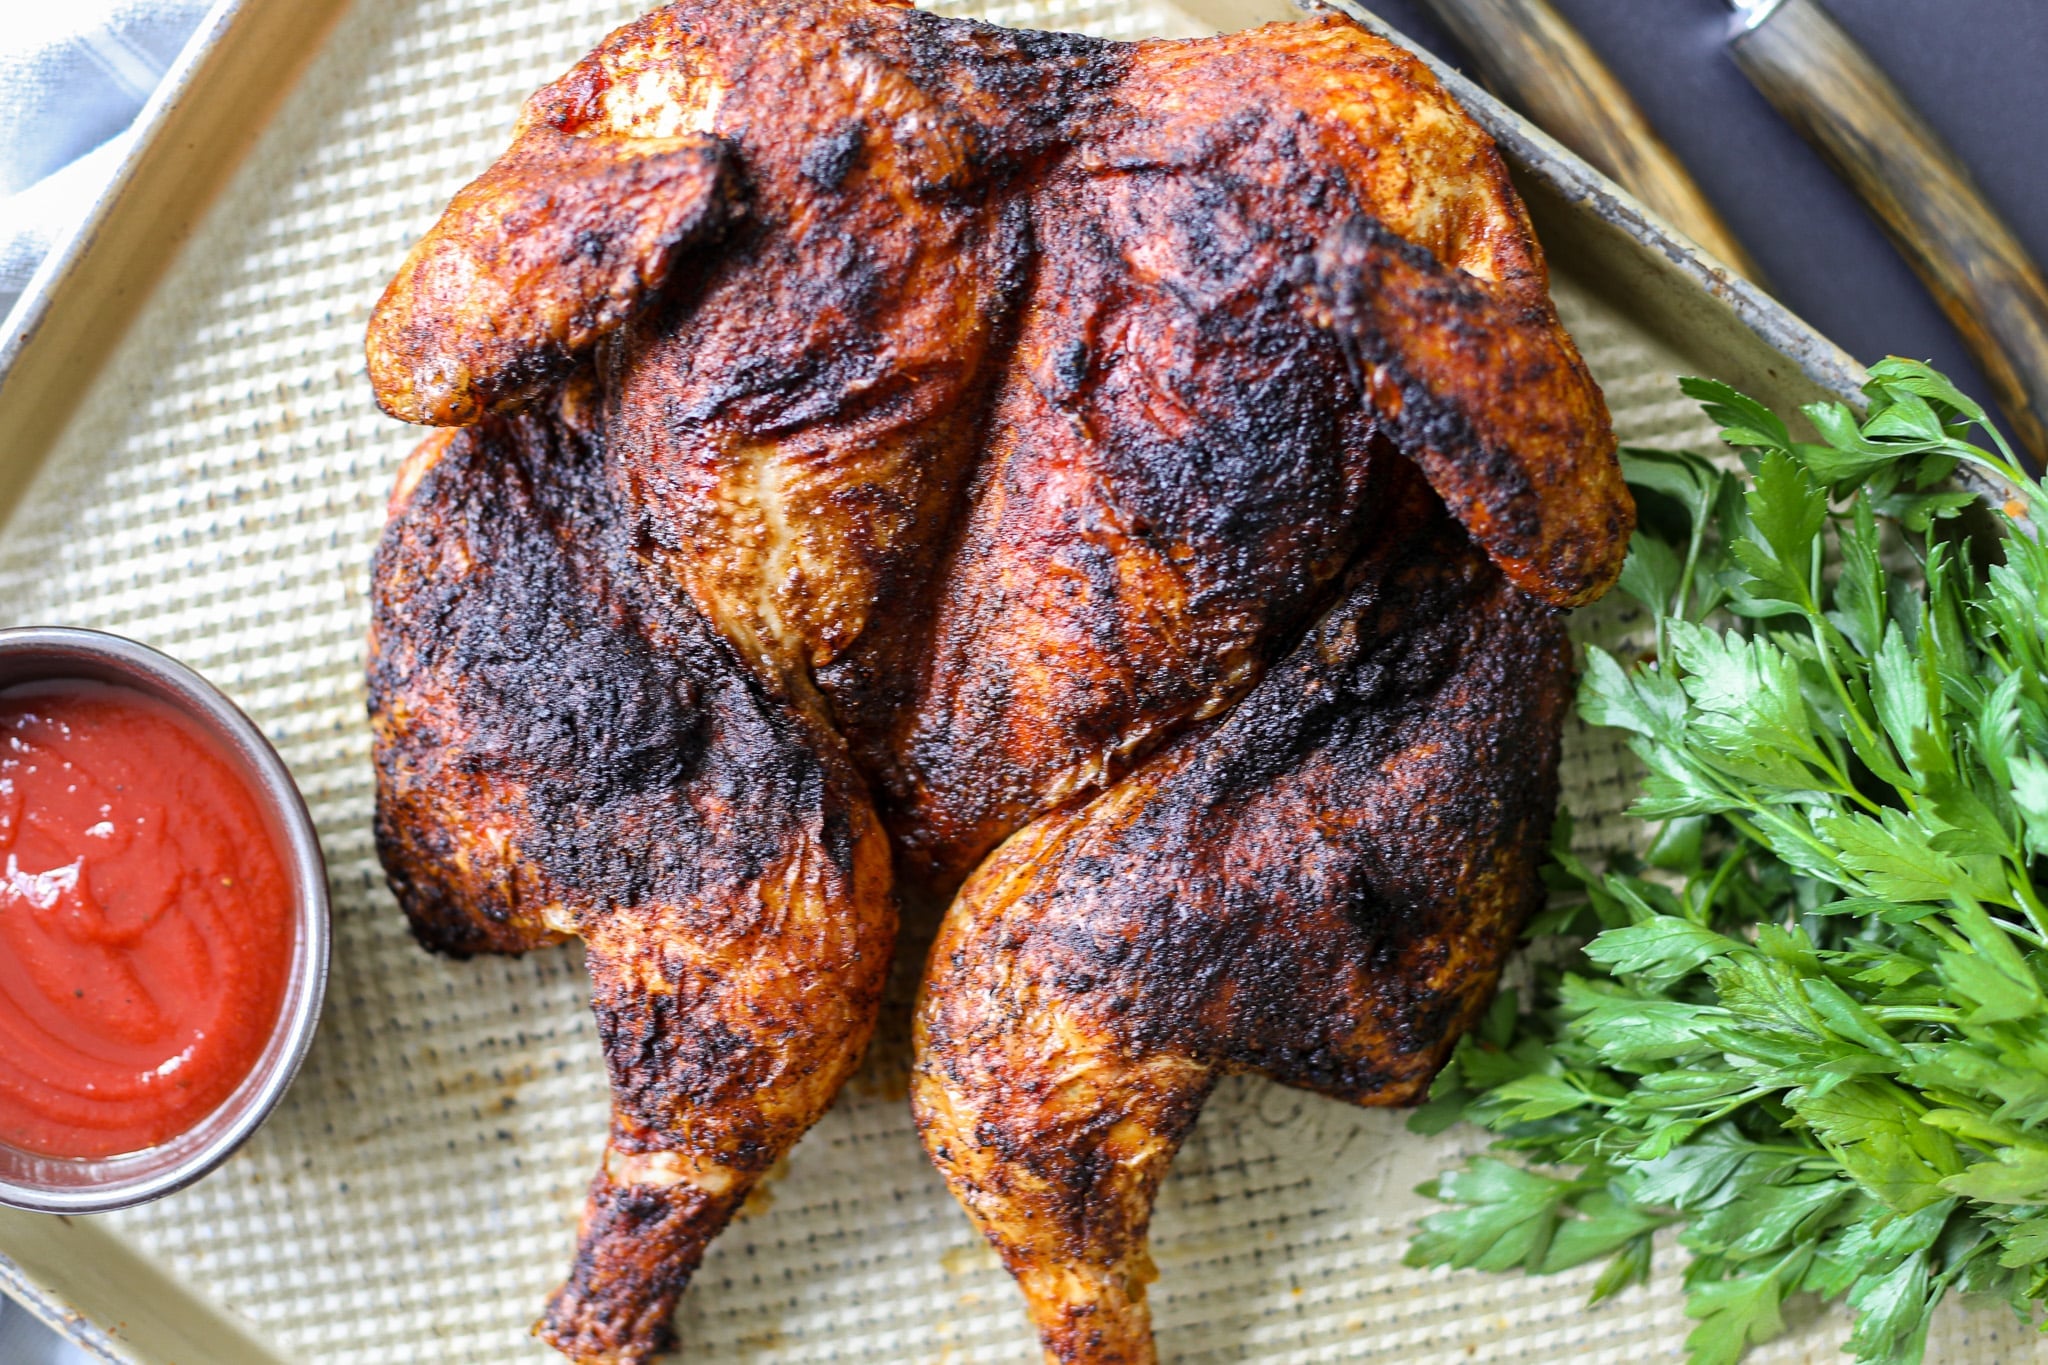
Roast whole chicken over indirect heat
Indirect heat is the most reliable way to cook a whole chicken without drying out the meat or burning the skin. By moving the bird away from the direct flame, you create an oven-like environment that cooks the interior evenly while allowing the skin to crisp gradually. This method requires patience, but it yields a juicier result than direct grilling, which often chars the outside before the inside reaches a safe temperature.
Set up two-zone fire
Start by arranging your charcoal or gas burners to create two distinct zones. For charcoal, pile the lit coals on one side of the grill and leave the other side empty. For gas, turn on only half the burners. The goal is to have a hot zone for searing and a cooler zone for roasting. Place a drip pan in the empty zone to catch fat and juices, which prevents flare-ups and keeps the grill clean. This setup mimics a convection oven, circulating heat around the bird.
Prepare and season the chicken
Pat the chicken dry with paper towels. Moisture is the enemy of crispy skin, so removing surface water is critical. Season generously with salt, pepper, and your preferred herbs. You can rub butter or oil under the skin to baste the meat from the inside as it cooks. If you prefer, stuff the cavity with aromatics like lemon halves, garlic cloves, or onion wedges to infuse flavor, but avoid packing them too tightly, which can block heat circulation.
Truss for even cooking
Trussing the chicken helps it maintain a compact shape, ensuring that the legs and wings cook at the same rate as the breast. Tie the legs together with kitchen twine and tuck the wing tips under the body. This prevents the thin wing tips from burning and keeps the cavity closed, retaining moisture. A neatly trussed bird sits flat on the grate, maximizing contact with the indirect heat and promoting uniform browning.
Place the chicken breast-side up on the grill grate directly over the drip pan, away from the heat source. Ensure there is at least an inch of clearance between the bird and the lid to allow for proper air circulation. Close the lid immediately to trap heat and begin the roasting process.
Insert an instant-read thermometer into the thickest part of the thigh, avoiding the bone. The chicken is done when the thigh reads 165°F (74°C) and the juices run clear. Check the temperature every 15-20 minutes. If the skin is browning too quickly, tent the bird loosely with foil to prevent burning while the interior finishes cooking.
Once the target temperature is reached, remove the chicken from the grill and transfer it to a cutting board. Let it rest for at least 10-15 minutes before carving. This allows the juices to redistribute throughout the meat. Skipping this step will result in dry, stringy chicken as the juices escape onto the board.
Troubleshooting common issues
If the skin is browning too fast, move the chicken slightly further from the heat source or tent it with foil. If the internal temperature stalls, check for cold spots in the grill or ensure the lid is sealed tightly. Always trust your thermometer over visual cues alone, as color can be deceptive. For charcoal grills, add a few more coals if the temperature drops below 325°F (163°C) to maintain steady cooking.
Why indirect heat works
Direct heat sears the exterior quickly, which is great for steaks but disastrous for whole birds with thick thighs and delicate breasts. Indirect heat acts like a slow oven, allowing the connective tissues in the legs to break down without overcooking the breast meat. This method ensures that every part of the chicken reaches a safe temperature simultaneously, resulting in tender, juicy meat throughout.
For detailed temperature guidelines and safety tips, refer to the Weber Grilling Guide, which provides precise charts for various cuts and grill types.
Check doneness with a thermometer
Grilling works best as a clear sequence: define the constraint, compare the realistic options, test the tradeoff, and choose the path with the fewest hidden costs. That order keeps the advice usable instead of decorative.
After each step, pause long enough to check whether the recommendation still fits the reader's actual situation. If it depends on perfect timing, unusual access, or a best-case budget, include a simpler fallback.
The simplest way to use this section is to write down the real constraint first, compare each option against it, and choose the path that still works outside ideal conditions.
Rest the meat before serving
Remove your filet mignon, burgers, and chicken from the grill and transfer them to a clean plate or cutting board. Cover the proteins loosely with foil to keep them warm without trapping too much steam, which can make the crust soggy.
Let the meat sit for five to ten minutes. This pause allows the muscle fibers to relax and the juices, which have been driven to the center by the heat, to redistribute throughout the cut. Cutting into the meat immediately will cause those flavorful juices to spill out onto the board, leaving your steak or burger dry.
Grilling Prep Checklist
Before you light the charcoal or ignite the burners, gather your tools. Missing a single item can interrupt the cooking rhythm, especially when you’re juggling filet mignon, burgers, and chicken at different temperature zones.
- Grill fuel: Charcoal with lighter fluid, or a full propane tank.
- Cleaning gear: Grill brush and paper towels.
- Thermometer: Instant-read for checking doneness.
- Meat: Filet mignon, burger patties, and chicken thighs or breasts.
- Seasoning: Oil, salt, pepper, and any rubs or marinades.
A quick inventory check saves you from opening the lid repeatedly to hunt for missing items, keeping your grill temperature stable for a better sear.
Common grilling mistakes to avoid
Good texture comes from matching the cooking cue to the food, not from trusting the timer alone. Check thickness, moisture, and doneness before changing the recipe.
-
Prep evenlyCut, roll, portion, or spread the mixture evenly so every piece cooks at the same pace.
-
Control moisturePat, drain, rest, or reduce wet ingredients when excess liquid would soften the final texture.
-
Use the doneness cueLook for the recipe-specific sign of doneness instead of stopping at the first browned edge.
-
Let it settleCool or rest the finished food long enough for steam and structure to stabilize.
No comments yet. Be the first to share your thoughts!