
Prep the grill
Open all vents and dampers fully. Light the grill and let it run for 10 to 15 minutes. This high-heat phase burns off residue from previous cooks and brings the grates to the right temperature. For gas grills, turn all burners to high. For charcoal, pile the coals evenly or bank them to one side if you need indirect heat zones.
While the grill heats, prepare your cleaning and oiling tools. Use a stiff wire brush to scrub the grates once they are hot. Then, dip a folded paper towel in vegetable oil, hold it with tongs, and wipe the grates. This thin layer of oil prevents food from sticking without causing flare-ups like heavy brushing might.
Keep your workspace organized. Have your meat, marinades, tongs, and thermometer within arm’s reach. A cluttered station leads to rushed decisions and burnt food. Once the grill is hot and clean, you are ready to start cooking.
Grill filet mignon
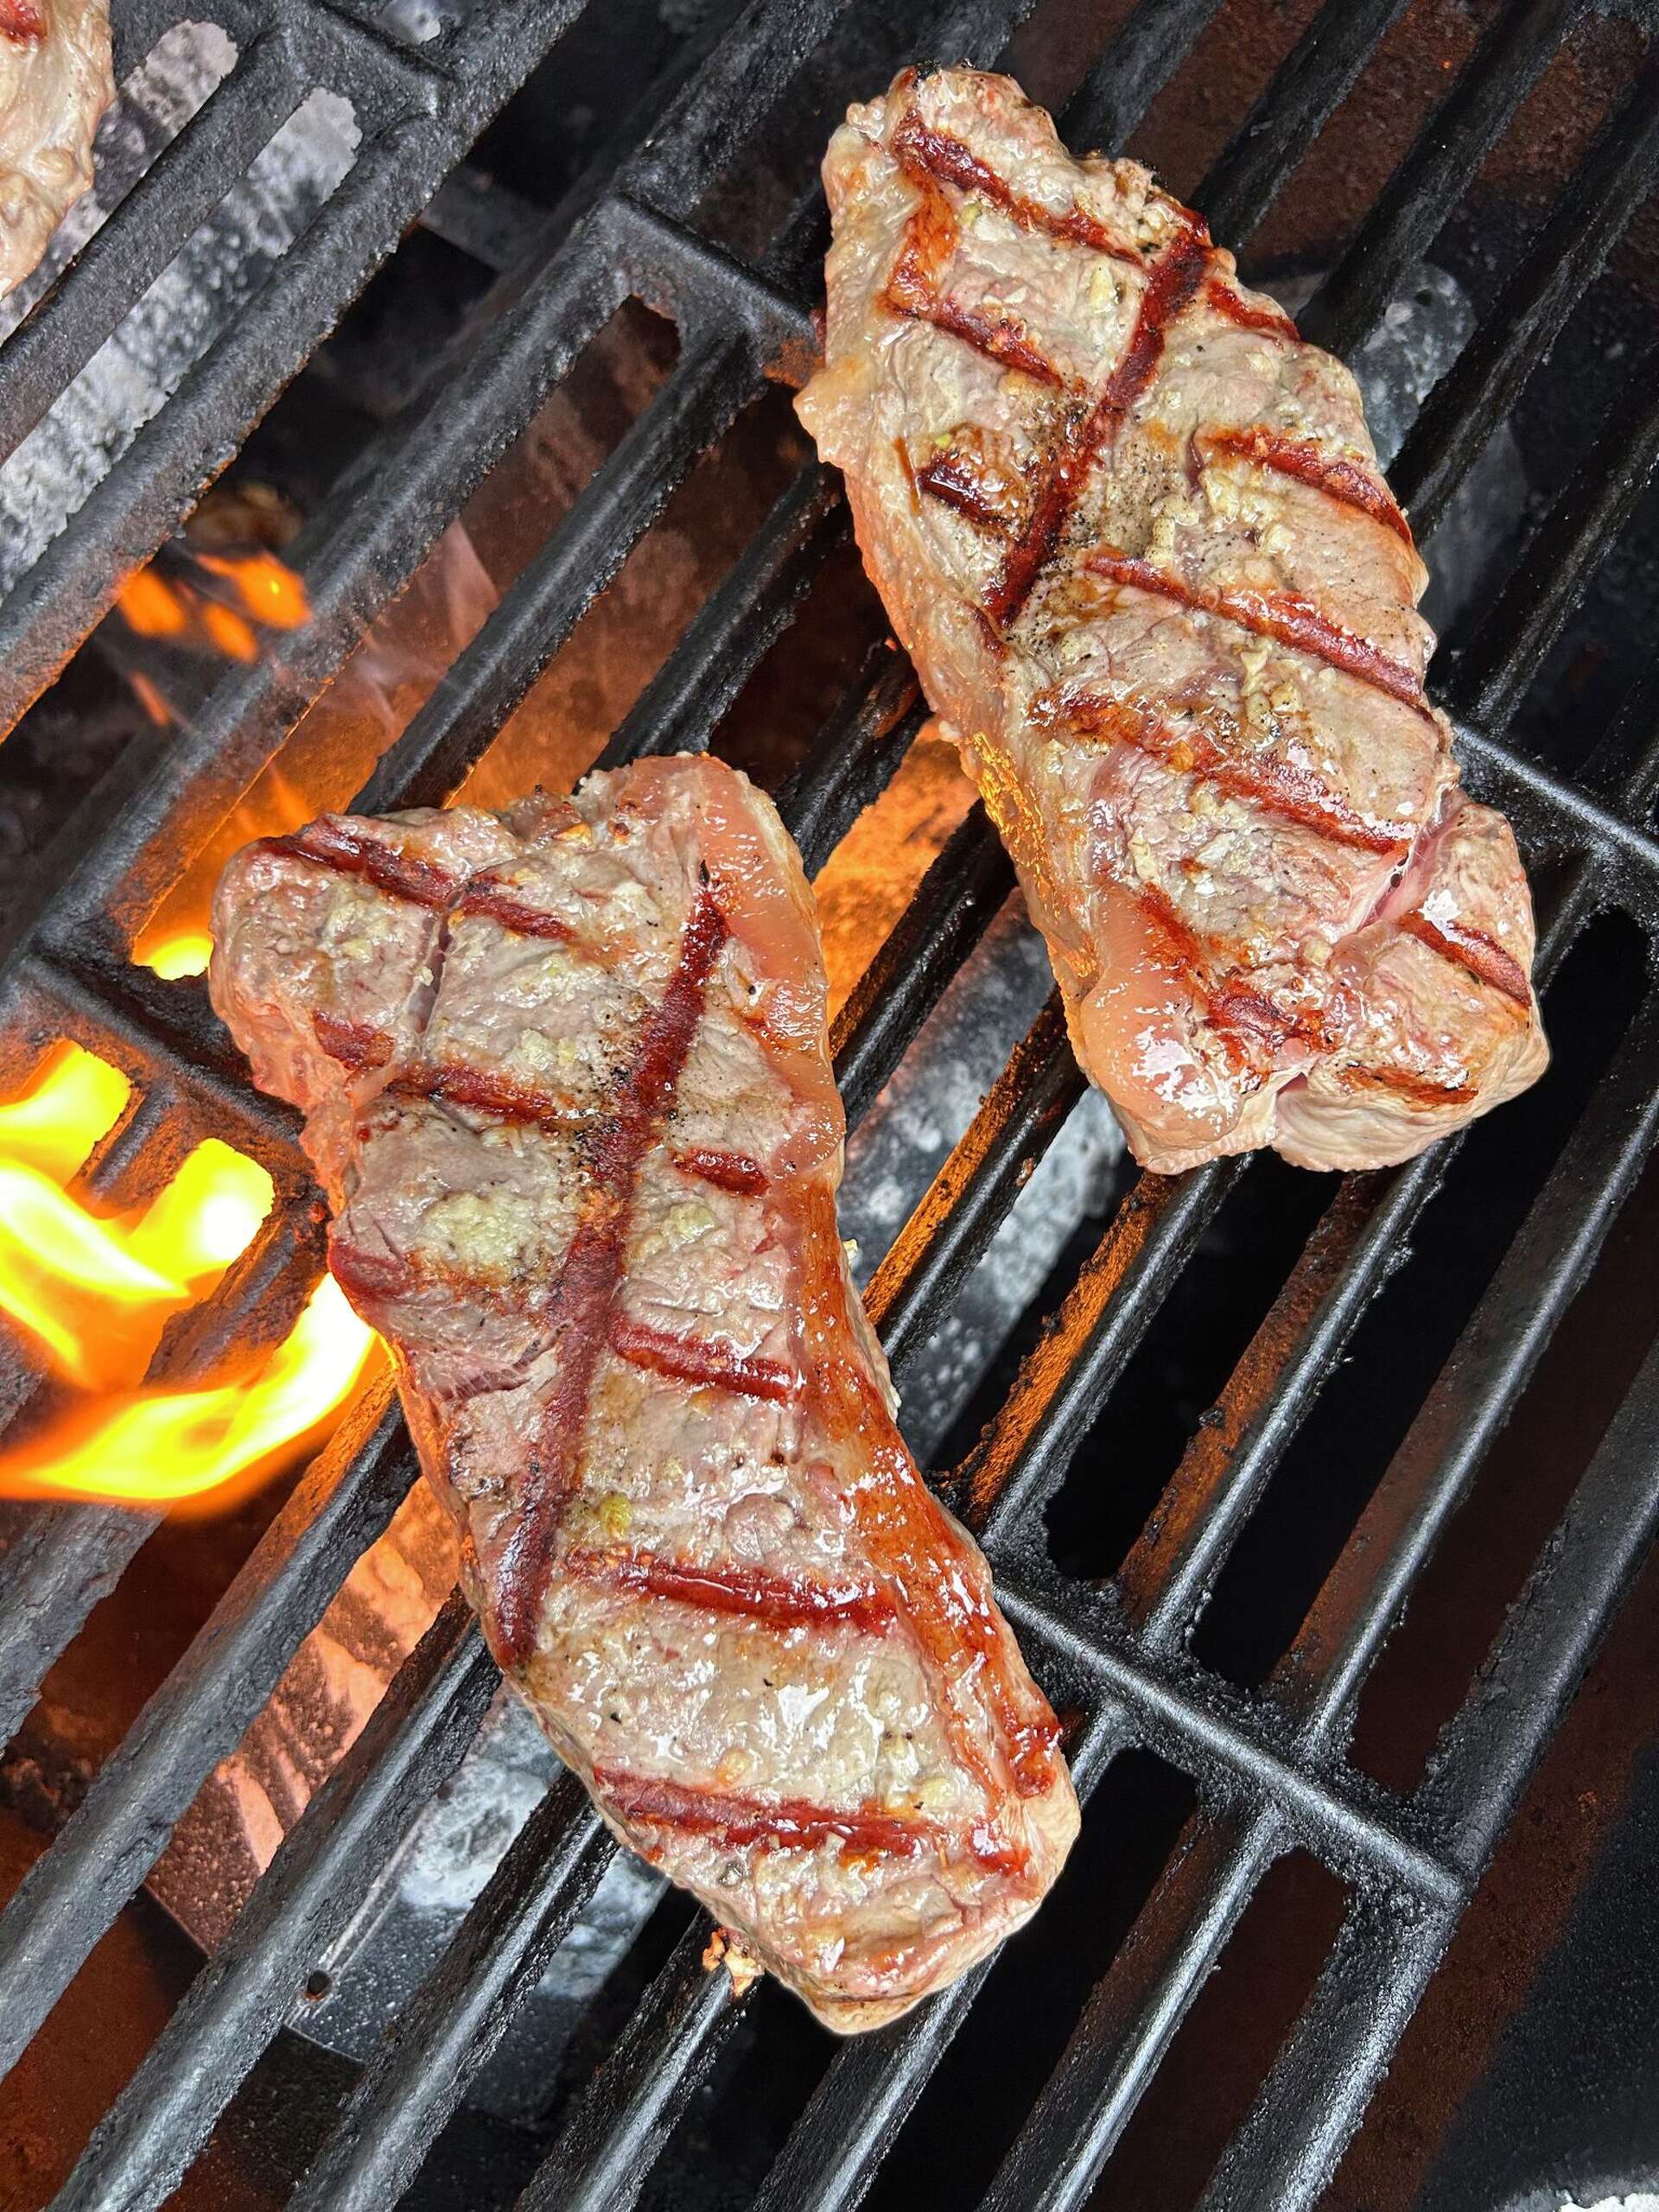
Filet mignon is lean, which means it cooks quickly and dries out if you lose track of time. The goal here is a dark, crunchy crust on the outside while keeping the center rare to medium-rare. Because the cut is thick, you need a two-zone fire: one side blazing hot for the sear, the other side cooler for gentle cooking.
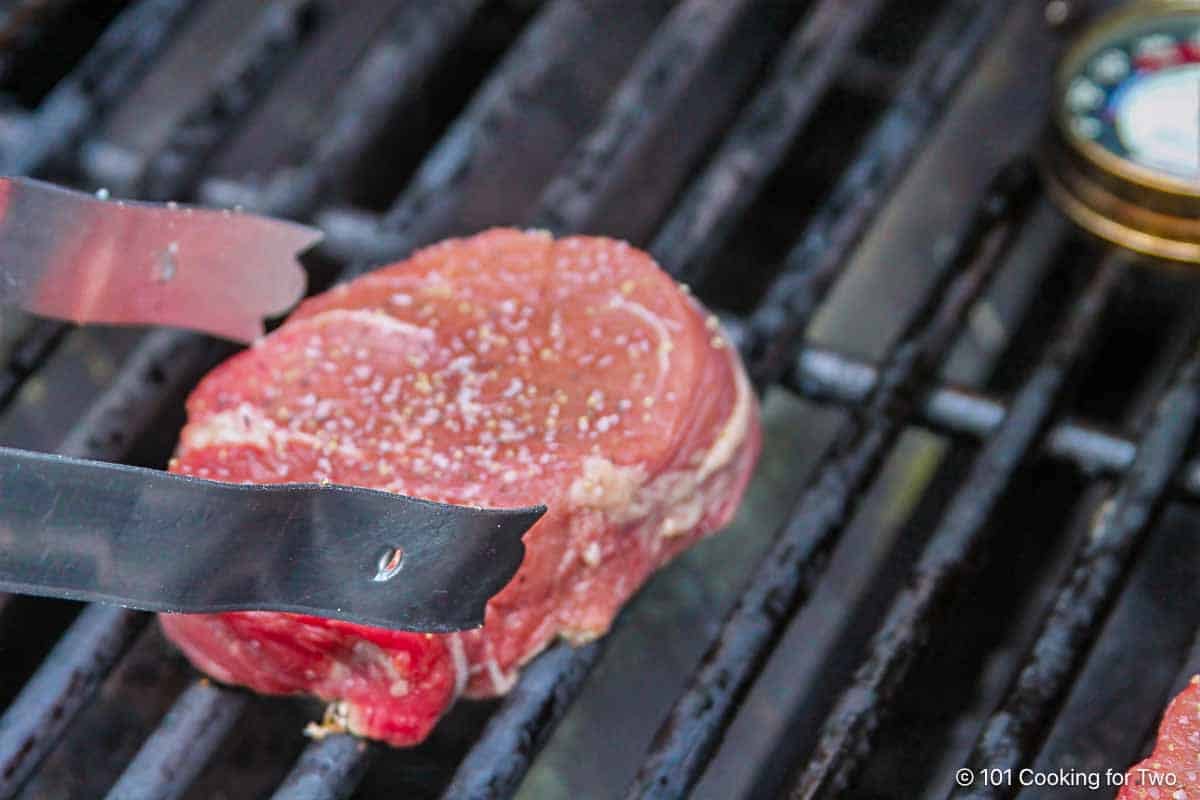
Pat the steaks completely dry with paper towels. Moisture is the enemy of a good crust; if the surface is wet, the steak steams instead of searing. Season generously with kosher salt and freshly cracked black pepper just before they hit the grill. Let them sit at room temperature for about 20 minutes while the grill heats up.
Place the steaks directly over the hottest part of the grill. Do not move them for two minutes. You want a deep brown crust to form. If the steak sticks, it isn't ready to flip. Once it releases easily, flip it and sear the other side for another two minutes. Sear the edges by holding the steak with tongs for 30 seconds each side.
Move the steaks to the cooler side of the grill, away from the flames. Close the lid to trap heat and cook until the internal temperature reaches 125°F (52°C) for rare or 135°F (57°C) for medium-rare. This usually takes 5 to 10 minutes depending on thickness. Use an instant-read thermometer to check the center without cutting into the meat.
Remove the steaks from the grill and place them on a cutting board or warm plate. Tent loosely with foil and let them rest for 5 minutes. This allows the juices to redistribute. If you cut into it immediately, the juices will run out, leaving the meat dry. The internal temperature will rise a few degrees during this rest.
A good filet mignon should feel soft but springy to the touch, similar to the fleshy part of your palm when your hand is relaxed. If it feels firm like your forehead, it is overcooked. Since the cut has little fat, basting with butter and herbs during the indirect heat phase adds richness without the risk of flare-ups.
Cook burgers
Ground meat behaves differently than whole cuts. The fat is distributed throughout, so handling it lightly is the only way to keep those juices inside the patty. Overworking the meat packs the proteins tight, turning a tender burger into a rubbery disk. Treat the mixture like a loose snowball, not a clay sculpture.
Start with cold ingredients. Warm fat melts before it hits the grill, leaving you with a dry patty. Mix the meat gently until the seasonings are just incorporated. Form the patties slightly larger than your buns, as they will shrink during cooking. Press a shallow dimple into the center of each patty with your thumb. This counteracts the natural tendency of the meat to puff up into a ball, keeping the burger flat and even.
Place the patties on a hot, clean grate. Do not press down on them with your spatula. That action squeezes out the flavorful juices directly onto the fire, causing flare-ups and leaving the meat dry. Let the burgers sear undisturbed for a few minutes until a crust forms. Flip only once, and only when the edges look done.
Grilling times vary based on thickness and heat intensity. The only reliable way to check doneness is an instant-read thermometer inserted into the side of the patty. The USDA recommends an internal temperature of 160°F (71°C) for ground beef to ensure safety. Pull the burgers from the grill when they are a few degrees below this mark; the residual heat will finish the cooking process while they rest.
Grill a whole chicken
Grilling a whole chicken requires patience and a two-zone fire. Direct heat crisps the skin but burns the meat before the center cooks through. Indirect heat surrounds the bird with steady warmth, roasting it evenly while the lid traps moisture. This method turns the grill into an oven, yielding tender meat and golden skin without flare-ups.
Set up the two-zone fire
Clear one side of your grill grate for direct heat and leave the other side empty for indirect cooking. For a gas grill, turn off the burners on one side and light only the opposite side. On a charcoal grill, pile the lit coals on one side and push them to the corner or edge. You need a cool zone where the chicken will sit, away from the flames. Aim for a grill temperature of 350°F to 375°F (175°C to 190°C) before adding the bird.
Prepare and position the chicken
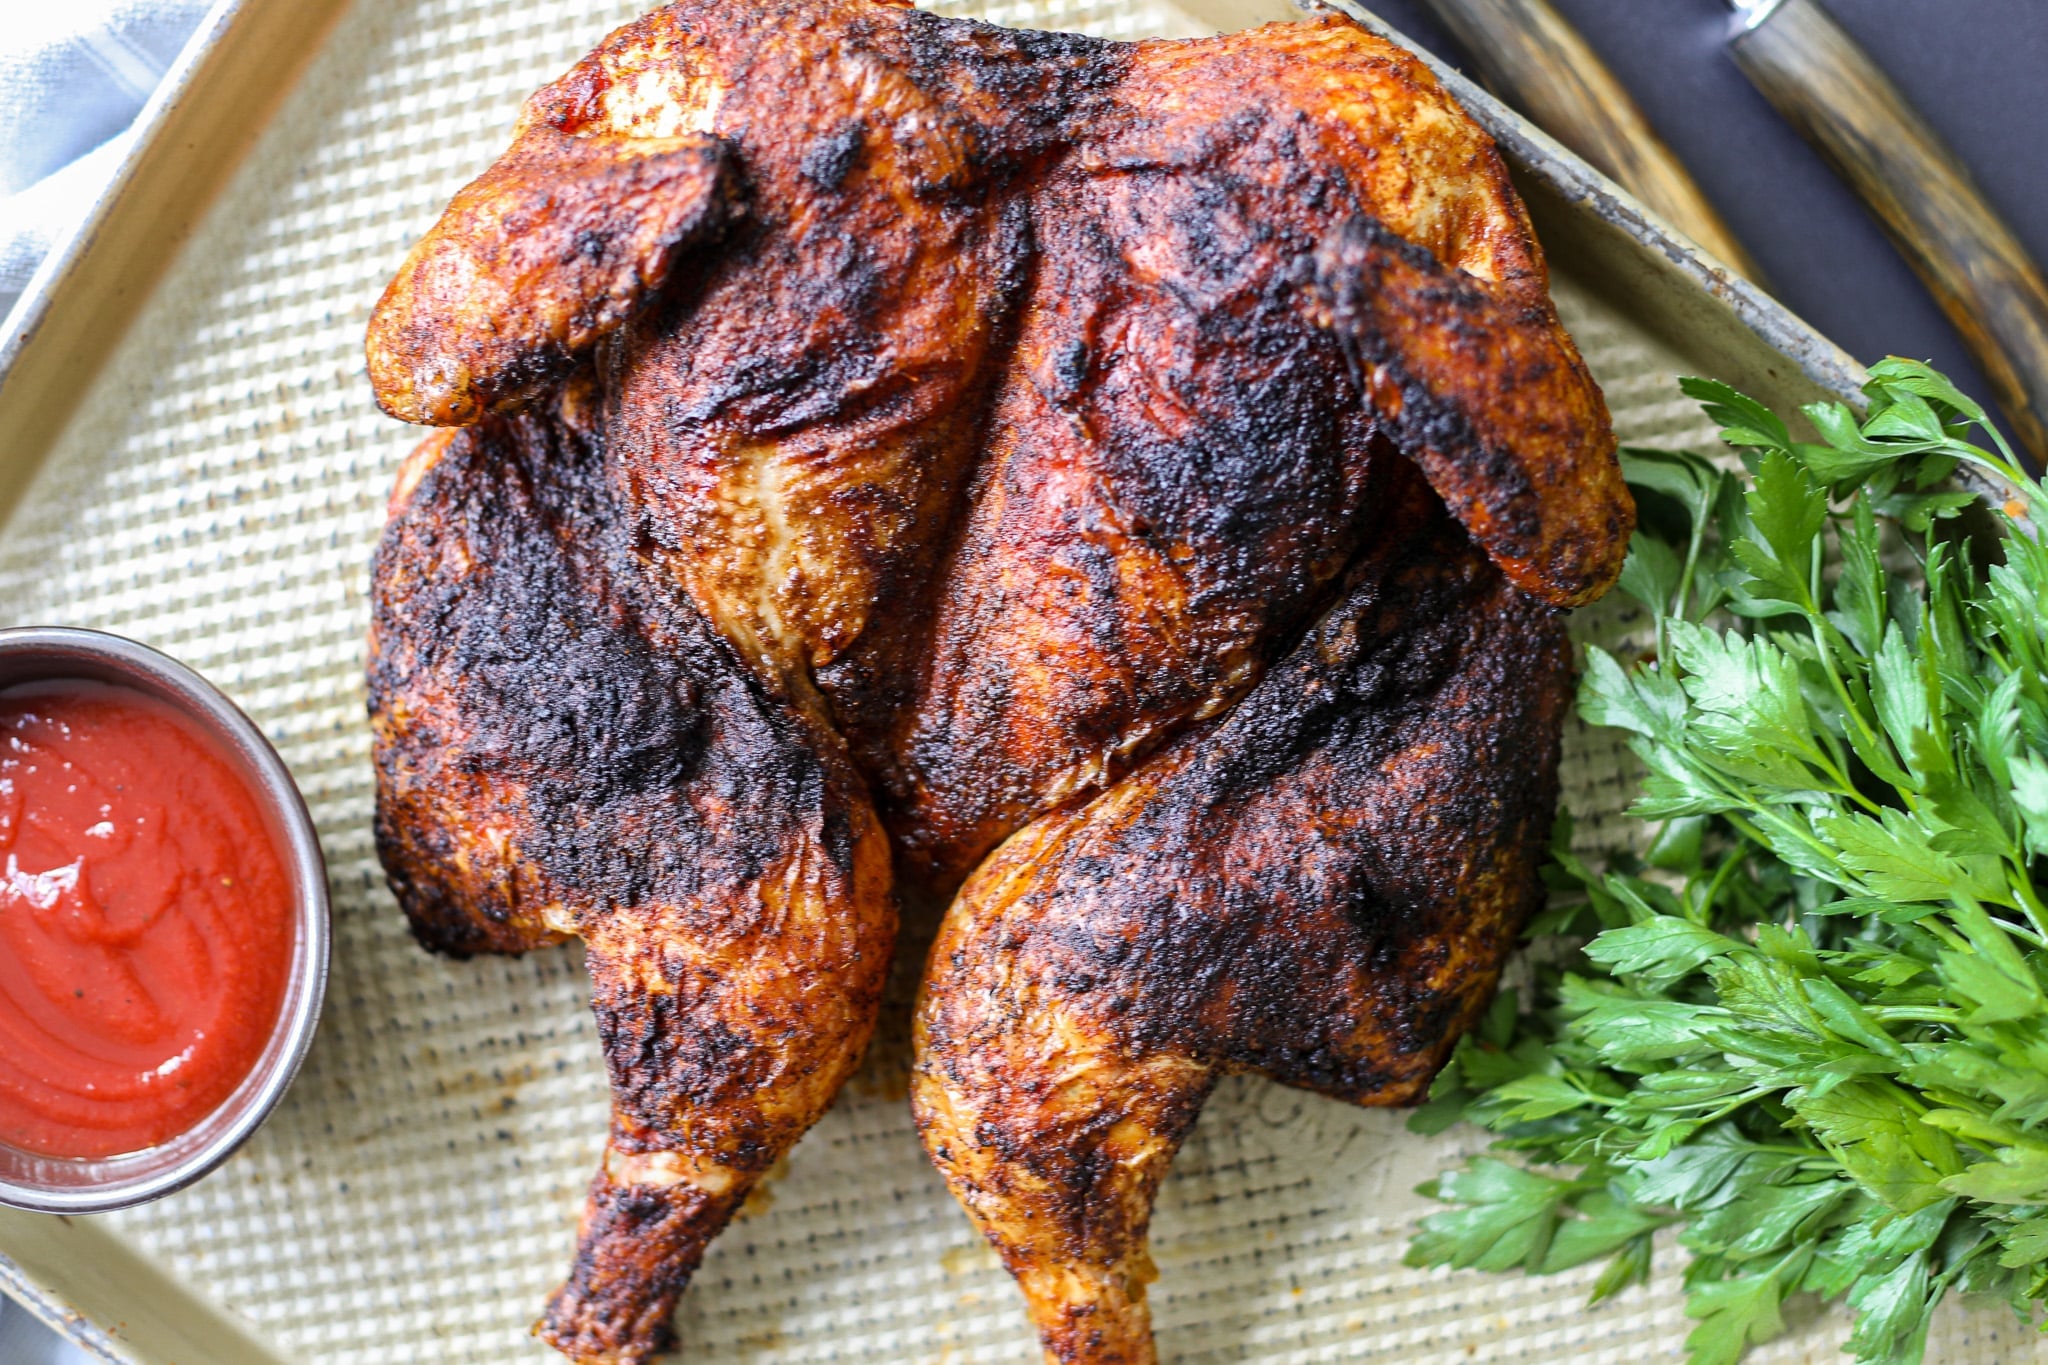
Pat the chicken dry with paper towels. This step is essential for crispy skin. Rub it with oil, salt, and your preferred spices. Place the chicken breast-side up on the cooler side of the grill, directly over the unlit burners or empty grate area. If your grill has a roasting rack, use it to keep the bird elevated and stable. Close the lid immediately to trap the heat. Do not open the grill frequently, as every release drops the temperature and extends cooking time.
Cook until the internal temperature is safe
A whole chicken typically takes 60 to 90 minutes to cook, depending on its size and your grill’s consistency. The only reliable way to check doneness is with a meat thermometer. Insert the probe into the thickest part of the thigh, avoiding the bone. The chicken is safe to eat when the thigh reaches 165°F (74°C). If the skin is browning too quickly but the meat isn’t done, move the bird slightly further from the heat source or tent it loosely with foil.
Rest and carve
Once the chicken hits 165°F, remove it from the grill. Transfer it to a cutting board or platter and let it rest for 10 to 15 minutes. Resting allows the juices to redistribute throughout the meat. If you carve immediately, the juices will spill out, leaving the meat dry. After resting, carve the chicken into portions and serve. The skin should be crisp, and the meat should pull easily from the bone.
Clear one side of the grill for direct heat and leave the other side empty for indirect cooking. Aim for 350°F–375°F.
Place the seasoned chicken breast-side up on the cooler side. Close the lid to trap heat and maintain consistent temperature.
Cook for 60–90 minutes. Insert a thermometer into the thickest part of the thigh. The chicken is done at 165°F.
Remove the chicken and let it rest for 10–15 minutes. This keeps the meat juicy before you carve and serve.
Watch a beginner grilling demo
Video is the fastest way to internalize grill management. Watching the heat behave in real time helps you recognize the difference between direct and indirect zones before you ever light the charcoal.
This tutorial walks through the basics of getting to know your grill, covering setup and heat control for beginners. It provides a clear visual reference for the steps outlined in this grilling guide.
Grilling checklist
Before lighting the grill, gather your tools. A reliable meat thermometer is the only way to know if your filet mignon or chicken is done. Pair it with long-handled tongs and a sturdy spatula for flipping burgers without losing juices.
Check your fuel supply. Whether you use charcoal or propane, ensure you have enough to maintain steady heat for the entire cookout. Clean the grates with a brush while they heat up to prevent sticking.
Prep your ingredients. Season your steaks and burgers just before they hit the grill. Keep raw meat separate from cooked items to avoid cross-contamination. Have a plate ready for resting meat after it comes off the heat.
No comments yet. Be the first to share your thoughts!