

Prep your grill for high heat
Before you touch the meat, the grill needs to reach its maximum temperature. This step is non-negotiable for getting a proper sear on steak, burgers, and chicken. If the grates aren't hot enough, your food will stick, and you won't get those essential grill marks or the Maillard reaction that creates flavor.
Heat it up
Turn on all burners to high, or spread your charcoal into an even layer. Close the lid immediately. This traps the heat and raises the internal temperature of the grill chamber quickly. Let it run for about 10 to 15 minutes. You are waiting for the metal components to absorb the heat, not just the air inside.
Check the temperature
Use your hand to gauge the heat. Hold your palm about five inches above the grates. If you can only hold it there for two seconds before it becomes painful, the grill is at high heat (roughly 450°F to 500°F). If you can hold it for three to four seconds, it is medium-high. For direct grilling, you want that two-second limit.
Clean and oil the grates
Once the grill is hot, use a sturdy grill brush to scrape off any leftover debris from previous cooks. Hot grates make this easier; food residue pops off more readily. After brushing, take a folded paper towel, dip it in high-smoke-point oil like canola or vegetable oil, and use tongs to wipe the grates. This creates a temporary non-stick surface. Do this right before you add the food to prevent the oil from burning off.
Grill filet mignon for a perfect crust
Filet mignon is the most tender cut of beef, but its lack of fat means it dries out quickly if mishandled. The goal is a deep, caramelized crust without overcooking the center. This section breaks down the specific steps to achieve that result.
Moisture is the enemy of a good sear. Before the steak hits the grill, pat the filet completely dry with paper towels. Season generously with kosher salt and freshly cracked black pepper. Avoid heavy rubs or marinades that can burn on high heat; let the beef’s natural flavor shine.
Preheat your grill to high heat, aiming for temperatures around 450–500°F (230–260°C). You want enough heat to sear the exterior instantly, creating the Maillard reaction that builds flavor. If using a charcoal grill, bank the coals to one side for a two-zone setup, but for the initial sear, go straight over the hottest part.
Place the filet directly over the heat source. Do not move it for two to three minutes. Let a crust form. If the steak sticks to the grates, it isn’t ready to flip. Once you see a deep brown crust, flip the steak. Sear the other side for another two minutes. This quick, high-heat exposure is what gives filet mignon its signature texture.
After searing both sides, move the steak to the cooler part of the grill (indirect heat) or reduce the burner to medium. Close the lid. This gentle cooking phase brings the internal temperature up without burning the exterior. Use an instant-read thermometer to monitor progress. For medium-rare, pull the steak at 130°F (54°C).
Transfer the cooked filet to a cutting board or warm plate. Let it rest for five minutes. This allows the juices, which concentrate in the center during cooking, to redistribute throughout the meat. Slicing immediately will cause those juices to spill out, leaving the meat dry. Serve whole or slice against the grain.
Cook burgers without drying them out
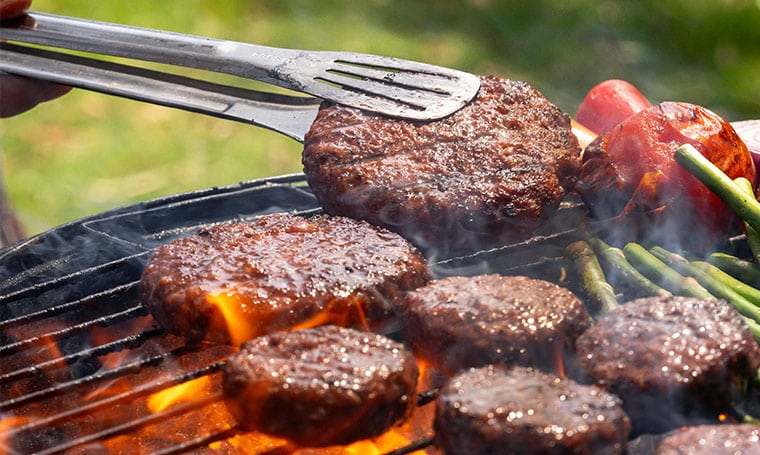
The biggest mistake people make when grilling burgers is pressing down on the patties with a spatula. That action squeezes out the fat and juices, leaving you with a dry, dense disc instead of a tender burger. Keep the grill grates clean and the heat high, but let the meat cook undisturbed to build a proper crust.
Build a crust, then flip once
Season your patties generously with salt and pepper. Place them on the hot grill and resist the urge to move them. You want a deep brown sear to form before flipping. If the patty sticks, it isn’t ready. Wait another minute or two until it releases naturally. This single flip method ensures even cooking and prevents the meat from falling apart.
Stop pressing the patty
It is tempting to press the burger to check for doneness or to spread the heat, but this is the fastest way to ruin a good patty. The juices have nowhere to go but onto the flames, causing flare-ups that char the outside while the inside remains undercooked. Trust the thermometer instead of your fingers. A clean flip and minimal handling keep the interior moist.
Hit the right internal temperature
Food safety is non-negotiable with ground beef. Unlike a steak, where searing the outside kills surface bacteria, the inside of a burger contains bacteria from the grinding process. You must cook ground beef to an internal temperature of 160°F (71°C) to ensure it is safe to eat. Use an instant-read thermometer inserted into the side of the patty for the most accurate reading.
Rest before serving
Once the burgers hit 160°F, remove them from the grill. Let them rest on a plate or cutting board for about five minutes. This allows the juices to redistribute throughout the meat rather than spilling out onto the bun immediately. While they rest, you can toast the buns on the grill grates for added texture.
Grilling a Whole Chicken on the Grill
Grilling a whole bird requires patience and a shift in strategy from searing steaks. You are no longer cooking for a quick crust; you are roasting meat through gentle, indirect heat. This method ensures the breast stays juicy while the dark meat near the bones reaches a safe temperature.
Brine or Dry Season
Start with a 4-to-12-hour brine for a 4-5 pound chicken. Saltwater penetration is the most reliable way to keep white meat from drying out during the long cook. If you skip brining, apply a generous layer of dry rub under the skin and over the breast, letting it sit uncovered in the fridge for an hour to dry the skin. Dry skin crisps better than wet skin.
Prepare Two-Zone Fire
Set up your grill for indirect heat. For charcoal, bank coals to one side. For gas, turn burners on one side to high and leave the other side off. You want a hot zone for searing later and a cooler zone for the bulk of the roasting. Place a drip pan in the center under the grate to catch fat and prevent flare-ups.
Place and Cook Indirectly
Place the chicken breast-side up on the cool side of the grill, skin-side up. Close the lid and maintain a grill temperature between 350°F and 375°F. Do not open the lid frequently; you need consistent heat to cook the thickest parts of the thigh and breast. This process takes about 45 to 60 minutes.
Check Temperature
Insert an instant-read thermometer into the thickest part of the thigh, avoiding the bone. The chicken is safe to eat when the thigh reads 165°F. If the breast is already at 150°F but the thigh is lower, check the thigh more frequently. Do not rely on visual cues alone; poultry safety depends on internal temperature.
Sear and Rest
If the skin is pale, move the chicken to the hot side of the grill for 1-2 minutes per side to crisp it up. Watch closely to avoid burning. Remove the chicken from the grill and tent it loosely with foil. Let it rest for 10 to 15 minutes before carving. This allows the juices to redistribute, ensuring every bite is moist.
Check your grill with a thermometer
Grilling works best as a clear sequence: define the constraint, compare the realistic options, test the tradeoff, and choose the path with the fewest hidden costs. That order keeps the advice usable instead of decorative. After each step, pause long enough to check whether the recommendation still fits the reader's actual situation. If it depends on perfect timing, unusual access, or a best-case budget, include a simpler fallback.
The simplest way to use this section is to write down the real constraint first, compare each option against it, and choose the path that still works outside ideal conditions.
Common grilling mistakes to avoid
Even experienced cooks slip up when the grill is hot and the clock is ticking. Most errors boil down to impatience or ignoring how heat moves through meat. Fix these habits, and your steak, burgers, and chicken will cook evenly without sticking or drying out.
Flipping too often
Many beginners think constant flipping cooks meat faster. It doesn’t. Every time you lift the meat, you break the sear and lose heat. Let the steak or chicken sit undisturbed until it releases naturally from the grates. For burgers, flip only once when juices pool on the top surface.
Moving meat too soon
Meat sticks to cold grates. If your steak or chicken breast won’t lift, the grill isn’t hot enough yet. Preheat your grill for 10–15 minutes until the grates are smoking hot. Oil the grates lightly, not the meat, to prevent sticking.
Ignoring heat zones
Grilling on high heat all the time burns the outside while leaving the inside raw. Create two zones: direct high heat for searing, and indirect medium-low heat for finishing. Move burgers and chicken to the cooler side after searing to cook through without charring.
Skipping the rest
Cutting meat immediately after grilling lets juices run out, leaving dry steak and chicken. Let meats rest for 5–10 minutes before slicing. This allows fibers to reabsorb moisture for a juicier bite.
Preheat your grill for 10–15 minutes until smoking hot. Lightly oil the grates to prevent sticking. Create two heat zones: direct high heat for searing, indirect medium-low for finishing.
Place meat on the hot side. Let it sear undisturbed until it releases naturally. Flip only once—when juices pool on top. Move to the cooler side to finish cooking through.
Remove meat from the grill. Let it rest for 5–10 minutes before slicing. This allows juices to reabsorb, keeping steak and chicken moist and flavorful.
Grilling Guide FAQ
No comments yet. Be the first to share your thoughts!