

Set up a two-zone fire
A two-zone fire divides your grill into a direct-heat zone for searing and an indirect-heat zone for gentle cooking. This setup prevents flare-ups and ensures thick cuts cook through without burning. It works for filets, burgers, and whole chickens alike.
Gas grill setup
Turn all burners to high and close the lid. Let the grill heat for 10–15 minutes until it reaches the target temperature. Once hot, turn off one or more burners on one side of the grill to create the indirect zone. The remaining lit burners form the direct zone. This allows you to sear steaks over the active burners and then slide them to the unlit side to finish cooking through evenly.
Charcoal grill setup
Light a chimney starter full of charcoal. Once the coals are ash-covered and glowing, pour them onto one side of the grill grate. This pile creates the direct-heat zone. Leave the other side empty of coals; this is your indirect-heat zone. Adjust the bottom vents to control the temperature: open fully for high heat (searing) and partially for low heat (slow roasting). The empty side acts as a safety buffer, allowing you to move food away from intense heat if flames flare up.
Why this matters
Direct heat is for searing and quick-cooking items like burgers or thin steaks. Indirect heat is for larger, thicker cuts like filet mignon or whole chickens that need time to cook through without charring. Starting with a two-zone setup ensures you have the flexibility to handle any protein on the grill safely.
Grill the filet mignon
Filet mignon is the most tender cut of beef, but its low fat content makes it easy to overcook. The goal is a deep, dark crust with a warm, pink center. This section covers the exact sequence for grilling filet mignon to perfection.
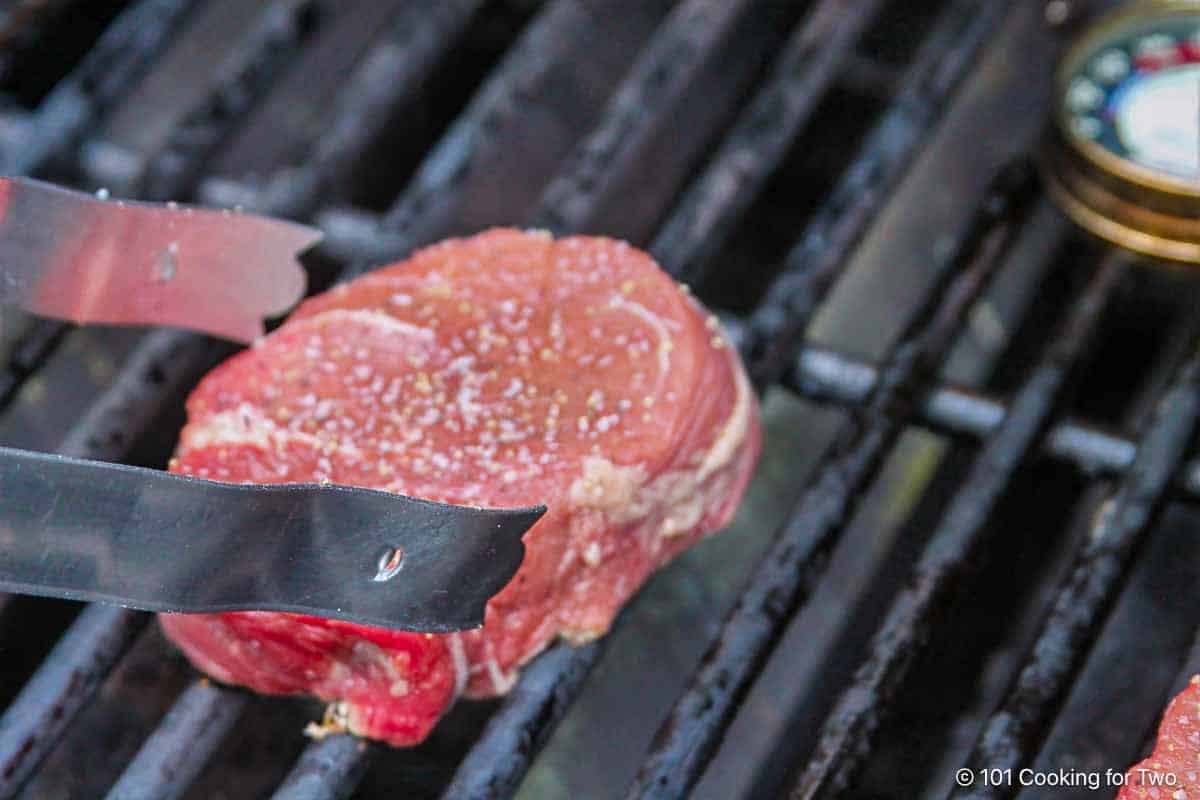
Remove the steaks from the refrigerator 45 minutes before cooking. Cold meat hits a hot grill and seizes up, leading to uneven cooking. Pat the steaks completely dry with paper towels. Moisture is the enemy of a good crust; if the surface is wet, it will steam instead of sear. Season generously with coarse kosher salt and black pepper just before they hit the grill.
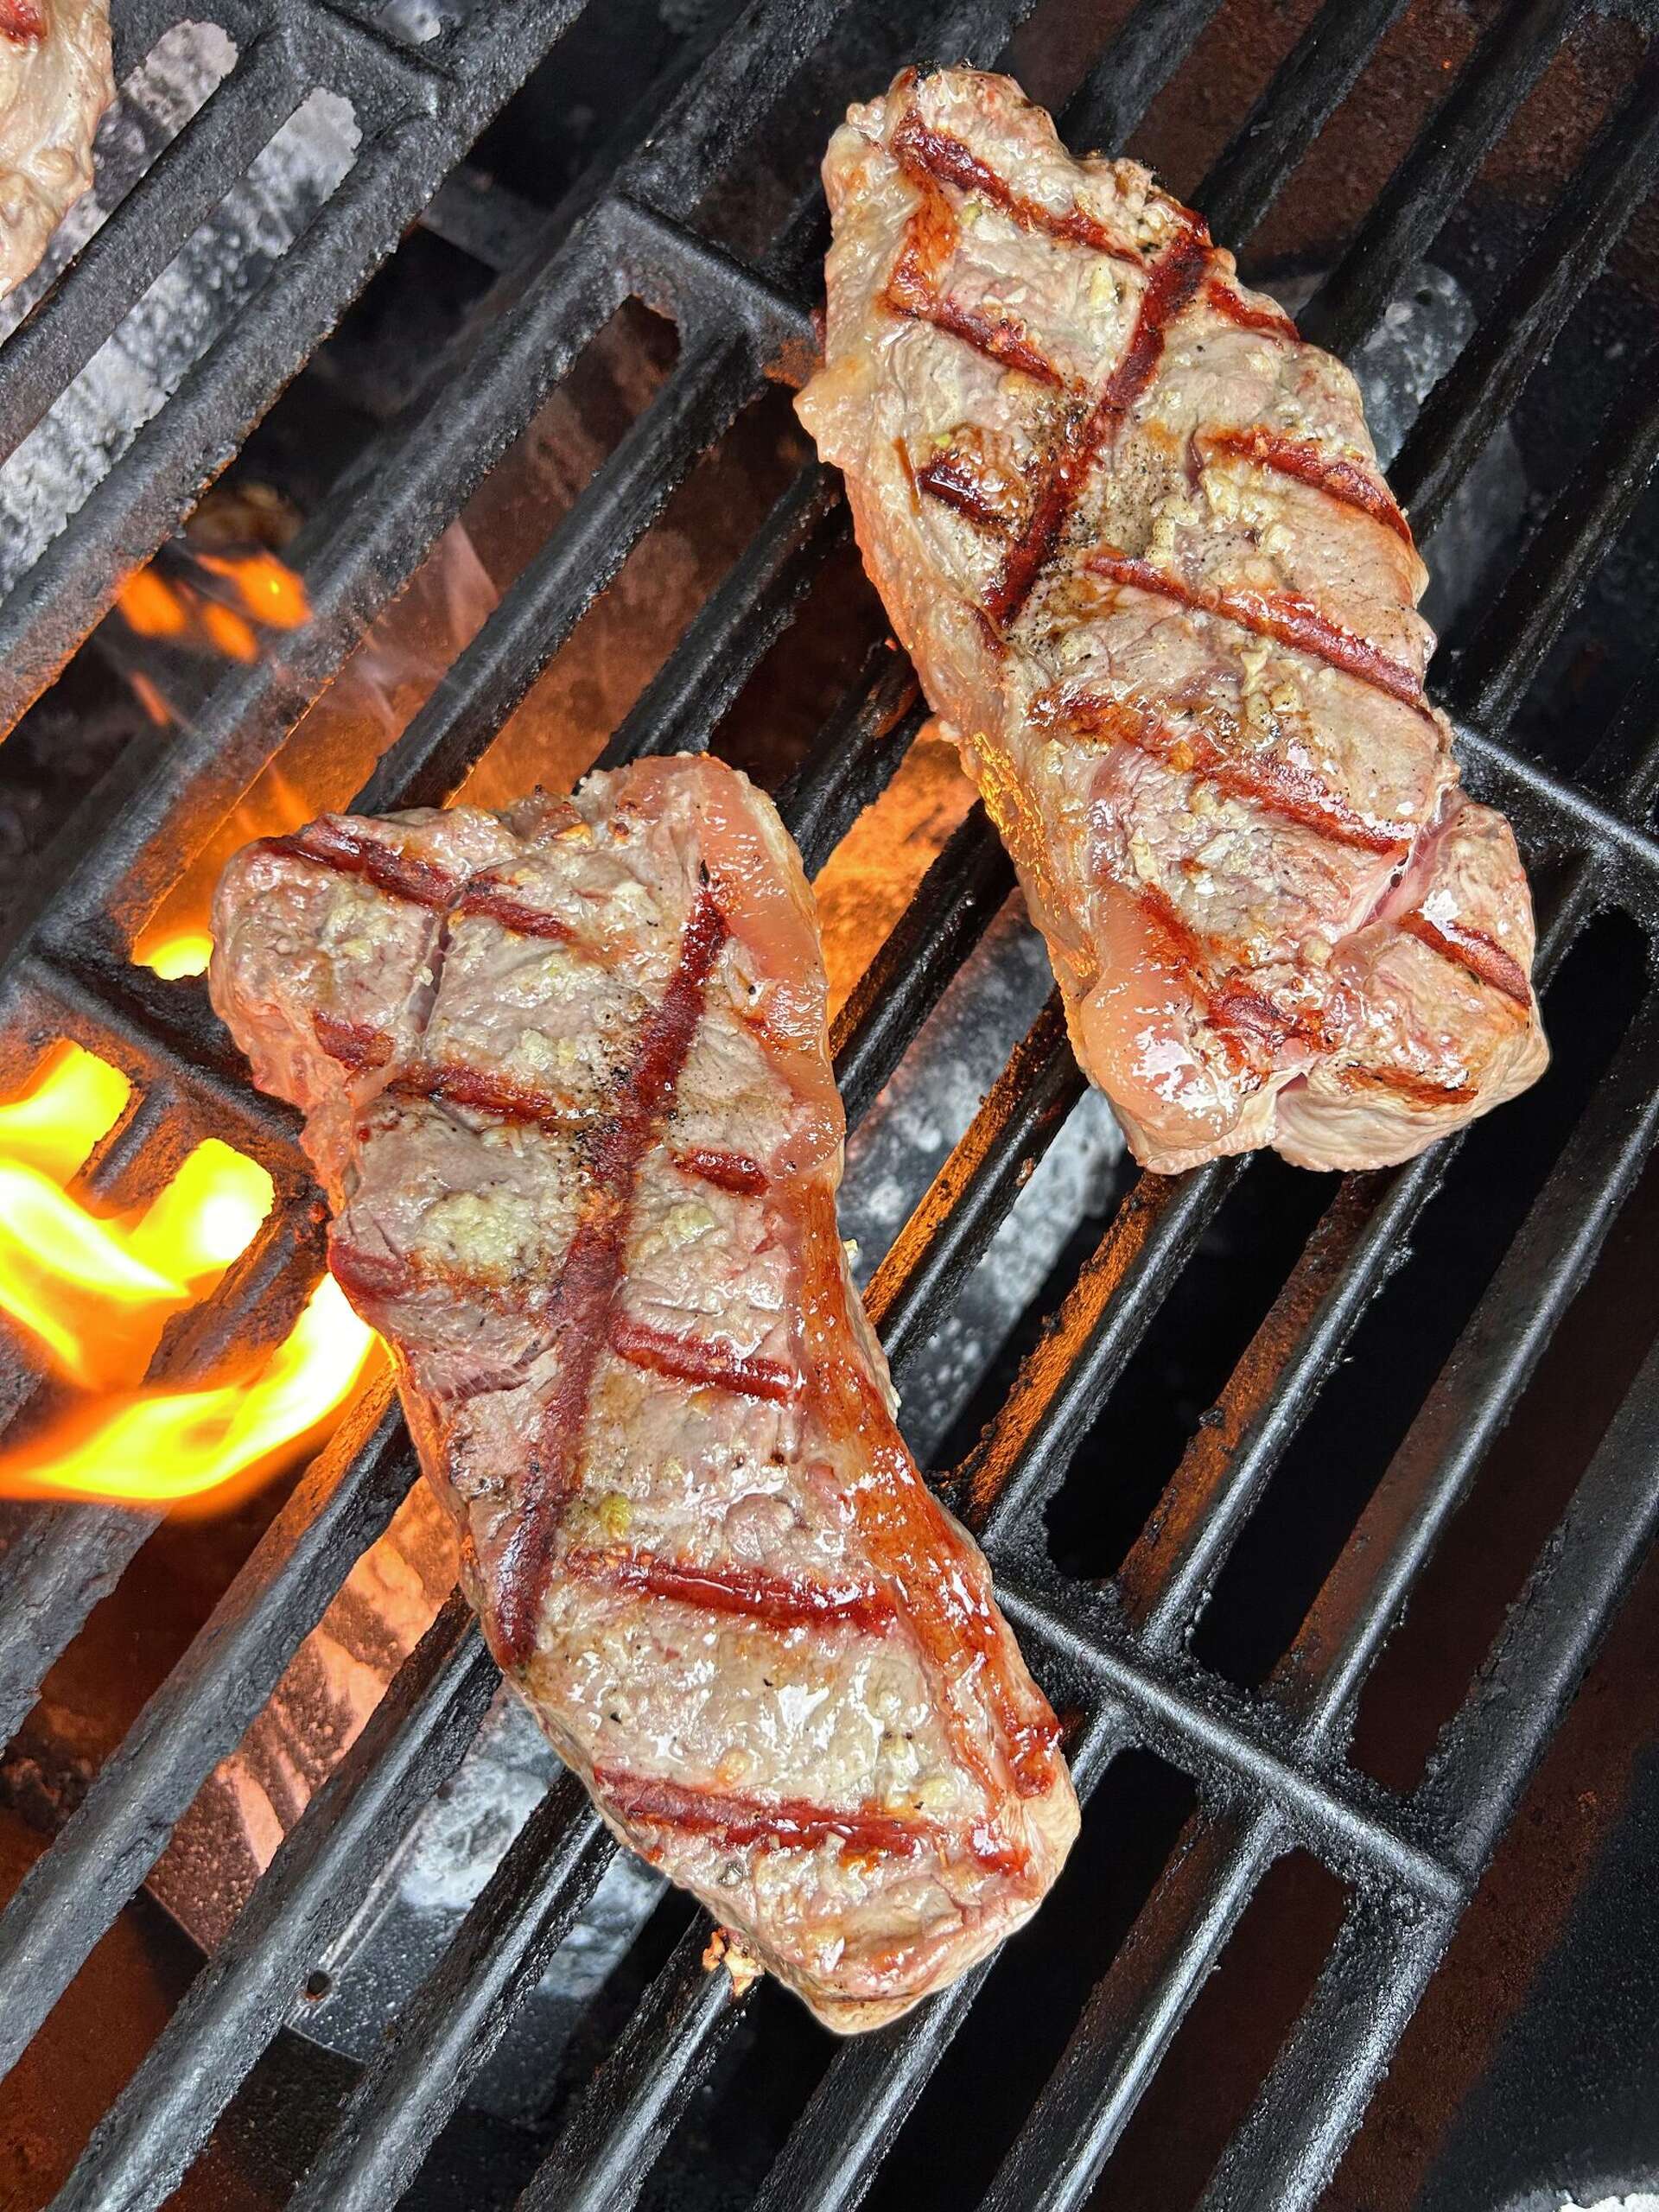
Place the steaks directly over the hottest part of your grill. For a thick cut (1.5 to 2 inches), leave them undisturbed for 3 to 4 minutes. You should see a deep brown crust forming. Do not press down on the steaks with a spatula, as this squeezes out the juices that keep the meat tender. Let the Maillard reaction do its work.
Flip the steaks once. Grill the second side for another 3 to 4 minutes. For a 1-inch steak, aim for an internal temperature of 125°F (52°C) for rare or 130°F (54°C) for medium-rare. Use an instant-read thermometer inserted into the side of the steak for accuracy. If the crust is darkening too fast but the center is still cold, move the steaks to a cooler part of the grill to finish cooking gently.
Transfer the steaks to a cutting board or warm plate. Tent them loosely with foil and let them rest for at least 5 minutes. This allows the muscle fibers to relax and reabsorb the juices. If you cut into the steak immediately, the juices will run out onto the plate, leaving the meat dry. Slice against the grain and serve.
Cook burgers to safety
The biggest hurdle in grilling is balancing juiciness with food safety. Unlike whole cuts like steaks or chicken, ground beef has a higher surface area exposed to bacteria during the grinding process. This means the interior of the patty must reach a safe internal temperature before it is safe to eat. The challenge is achieving that temperature without squeezing the life out of the meat, turning a potential centerpiece into a dry, crumbly disc.
The secret lies in how you handle the meat and manage the heat. You want a crust that seals in flavor and a center that is cooked through but still moist. This requires a specific sequence: forming the patties correctly, creating a heat zone that allows for searing and gentle cooking, and using a thermometer to verify doneness without guessing.
Form patties with a dimple
Start with cold ground beef. Handle it as little as possible; overworking the meat develops tough proteins that make the burger dense. Divide the beef into equal portions and gently shape them into disks. Make them slightly wider than your bun, as they will shrink during cooking.
Press a shallow indentation into the center of each patty with your thumb. This "dimple" counteracts the natural tendency of the meat to puff up into a ball as it heats. By flattening the center slightly, you ensure the patty cooks evenly and stays flat on the grill grates.
Create two-zone heat
Before placing the burgers on the grill, set up your heat source for two zones. Light the charcoal or burners on one side of the grill for high, direct heat, and leave the other side unlit or on low for indirect heat. This setup gives you control: you can sear the exterior quickly to develop flavor and color, then move the burgers to the cooler side to finish cooking gently.
If you cook burgers over high heat the entire time, the outside will burn before the inside reaches a safe temperature. The two-zone method prevents this, allowing the internal temperature to rise steadily without charring the exterior.
Grill and check temperature
Place the patties on the hot side of the grill to sear. Let them cook undisturbed for two to three minutes to develop a crust. Flip them once, then move them to the indirect heat zone to finish cooking. This method preserves juices by avoiding prolonged exposure to intense direct flame.
Use an instant-read thermometer to check the internal temperature. Insert the probe into the thickest part of the patty. For ground beef, the USDA recommends an internal temperature of 160°F (71°C) to ensure safety. This is the non-negotiable step; visual cues like color are unreliable indicators of doneness.
Rest before serving
Once the burgers reach 160°F, remove them from the grill and let them rest on a plate for three to five minutes. This resting period allows the juices, which have been driven to the center by the heat, to redistribute throughout the patty. If you cut into them immediately, those juices will spill out, leaving the meat dry.
Resting is the final step in keeping burgers juicy. It ensures that every bite is moist and flavorful, not just the first one. Combine this with proper handling and heat management, and you will consistently cook burgers that are both safe and delicious.
Roast the whole chicken indirectly
Indirect heat turns your grill into an oven, allowing the whole chicken to cook through evenly without the skin burning before the meat is safe. This method is essential for larger cuts that need time to reach temperature without drying out.
1. Brine or season the bird
Start with a dry brine or wet brine if you have time. Salt draws moisture into the meat and seasons it deeply. If you are short on time, pat the chicken dry and rub it generously with olive oil, salt, pepper, and your favorite herbs. The skin needs to be dry before it hits the grill to crisp up properly.
2. Set up the indirect zone
For a gas grill, turn on the burners on one side and leave the other side off. For charcoal, pile the coals to one side, leaving the other half empty. You want a cool zone where the heat circulates around the bird rather than radiating directly into it. Preheat the grill to medium-high, around 375°F to 400°F (190°C to 200°C).
3. Place the chicken on the grate
Place the chicken on the cooler side of the grill, breast-side up. If your chicken is large, you can tuck the wing tips behind the back to prevent them from charring. Close the lid immediately. The goal is to trap heat and smoke, roasting the bird from all angles.
4. Monitor and baste
Cook the chicken for about 45 to 60 minutes. Avoid opening the lid too often, as this drops the temperature and extends cooking time. You can baste the bird with pan juices or butter every 15 minutes to keep it moist, but be careful not to flare up the flames if using charcoal.
5. Check for doneness
The chicken is done when the internal temperature reaches 165°F (74°C) in the thickest part of the thigh, away from the bone. The juices should run clear, not pink. If the skin is browned but the meat isn't done, move the bird directly over the heat for a minute or two to finish, watching closely to prevent burning.
Rest the meat before serving
Turning off the heat is the final step in the cooking process, but it is not the final step in preparing the meal. Letting the protein sit allows the muscle fibers to relax and reabsorb the juices that migrated to the center during cooking. If you slice immediately, those juices spill onto the cutting board, leaving the meat dry and less flavorful.
Each type of protein requires a different amount of time to settle. Filet mignon is dense and benefits from a longer rest to redistribute the fat and moisture. Burgers, being ground meat, cool and stabilize more quickly. Whole chicken needs enough time for the juices in the breast and thighs to equalize.
Filet mignon
Let the steak rest for 5 to 10 minutes. Tent it loosely with foil to keep it warm without trapping steam, which can make the crust soggy.
Burgers
Rest burgers for 3 to 5 minutes. This brief pause allows the internal temperature to stabilize and the juices to settle back into the patty.
Whole chicken
Rest the bird for 15 to 20 minutes. This longer duration ensures the juices in the larger mass of meat redistribute evenly throughout the carcass.
While you wait, you can prepare simple pan sauces using the rendered drippings left in the pan. This adds flavor without rushing the resting process, which is essential for a tender result.
Grilling Checklist and FAQ
Get your grill ready with the right tools before lighting the fire. A clean grate, proper oiling, and accurate temperature reading make the difference between a perfect meal and a stuck dinner.
What is the correct order for grilling food?
Start with the longest-cooking items. Place the whole chicken on the cooler side of the grill first to allow it to cook through without burning. Once the chicken is nearly done, add the burgers and filet mignon to the hotter zones. This sequence ensures everything finishes at the same time, keeping the meal hot and preventing overcooked meat.
What are the safe internal temperatures?
Food safety is non-negotiable. Use a thermometer to check the thickest part of the meat, avoiding bone. Filet mignon is safe at 145°F with a three-minute rest. Burgers should reach 160°F. Whole chicken must reach 165°F in the thickest part of the breast and thigh. When in doubt, cook it longer.
Can I grill frozen food?
Avoid grilling frozen meat. Ice crystals create a barrier that prevents proper searing and leads to uneven cooking. Always thaw meat in the refrigerator before grilling to ensure the outside doesn’t burn while the inside remains raw.
No comments yet. Be the first to share your thoughts!