
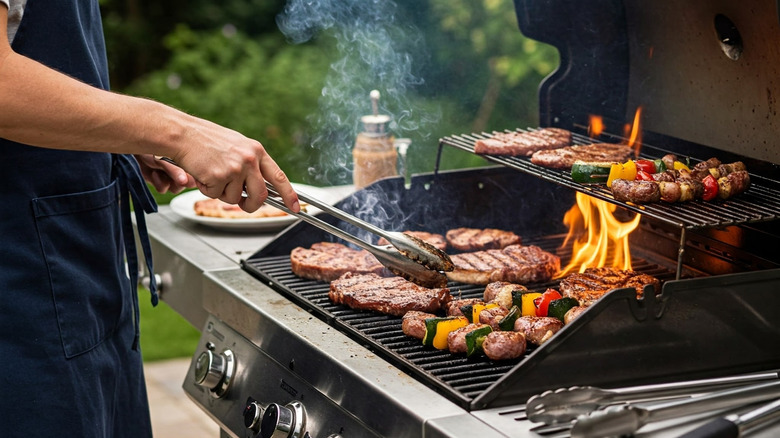
Set up two-zone heat
Before you place any protein on the grate, you need to configure your grill for two distinct heat zones. This setup is the foundation of successful grilling because it gives you control over how fast the food cooks and whether it char or steams. By creating a direct heat side and an indirect heat side, you can sear a filet mignon quickly, then move it to the cooler side to finish cooking without burning the exterior. The same logic applies to whole chicken, which needs low, slow heat to render fat and cook through, and burgers, which benefit from a hot sear followed by a gentle finish.
Start by arranging your charcoal or gas burners. If you are using charcoal, pile the lit coals on one half of the grill, leaving the other half empty. This empty side becomes your indirect zone, where the heat is ambient rather than radiating directly from the flames. For gas grills, turn all burners to high to preheat, then turn off one or more burners on one side. Keep the burners on the other side on medium or high. This creates a hot side for searing and a cool side for holding or slow cooking.
Use a grill thermometer or your hand to verify the temperature difference. The direct zone should be hot enough to sizzle water instantly—typically 400°F to 450°F for steaks and burgers. The indirect zone should be cooler, around 300°F to 350°F, suitable for whole chicken or thicker cuts that need time to reach the target internal temperature without charring. This two-zone system acts like a kitchen with a stove and a warming drawer: you use the high heat for the initial reaction and the low heat for the thorough cook.
Once your zones are set and the grates are clean and oiled, you are ready to cook. Keep your tongs and a meat thermometer within arm's reach. When you move food from the direct to the indirect side, close the lid to trap the heat, turning your grill into an oven. This method prevents flare-ups from burning your food and ensures even cooking across all three proteins.
Grill filet mignon to medium-rare
Thick-cut filet mignon is lean and tender, but it lacks the fat cap of a ribeye. This means it can dry out quickly if you overcook it. The goal is a crisp, dark crust on the outside and a cool, pink center. We will use a two-zone fire to get there without burning the exterior.
1. Bring the steak to room temperature
Remove the filet mignon from the refrigerator at least 30 minutes before grilling. Cold meat hitting hot grates causes uneven cooking; the outside will burn before the inside reaches the target temperature. Pat the steak completely dry with paper towels. Moisture creates steam, which prevents the Maillard reaction—the chemical process that gives grilled food its savory crust.
2. Season generously
Just before placing the steak on the grill, coat both sides with coarse kosher salt and freshly cracked black pepper. Use enough salt to feel substantial on the tongue. A simple seasoning allows the quality of the beef to shine. Avoid heavy marinades, which can mask the natural flavor of a premium cut like filet.
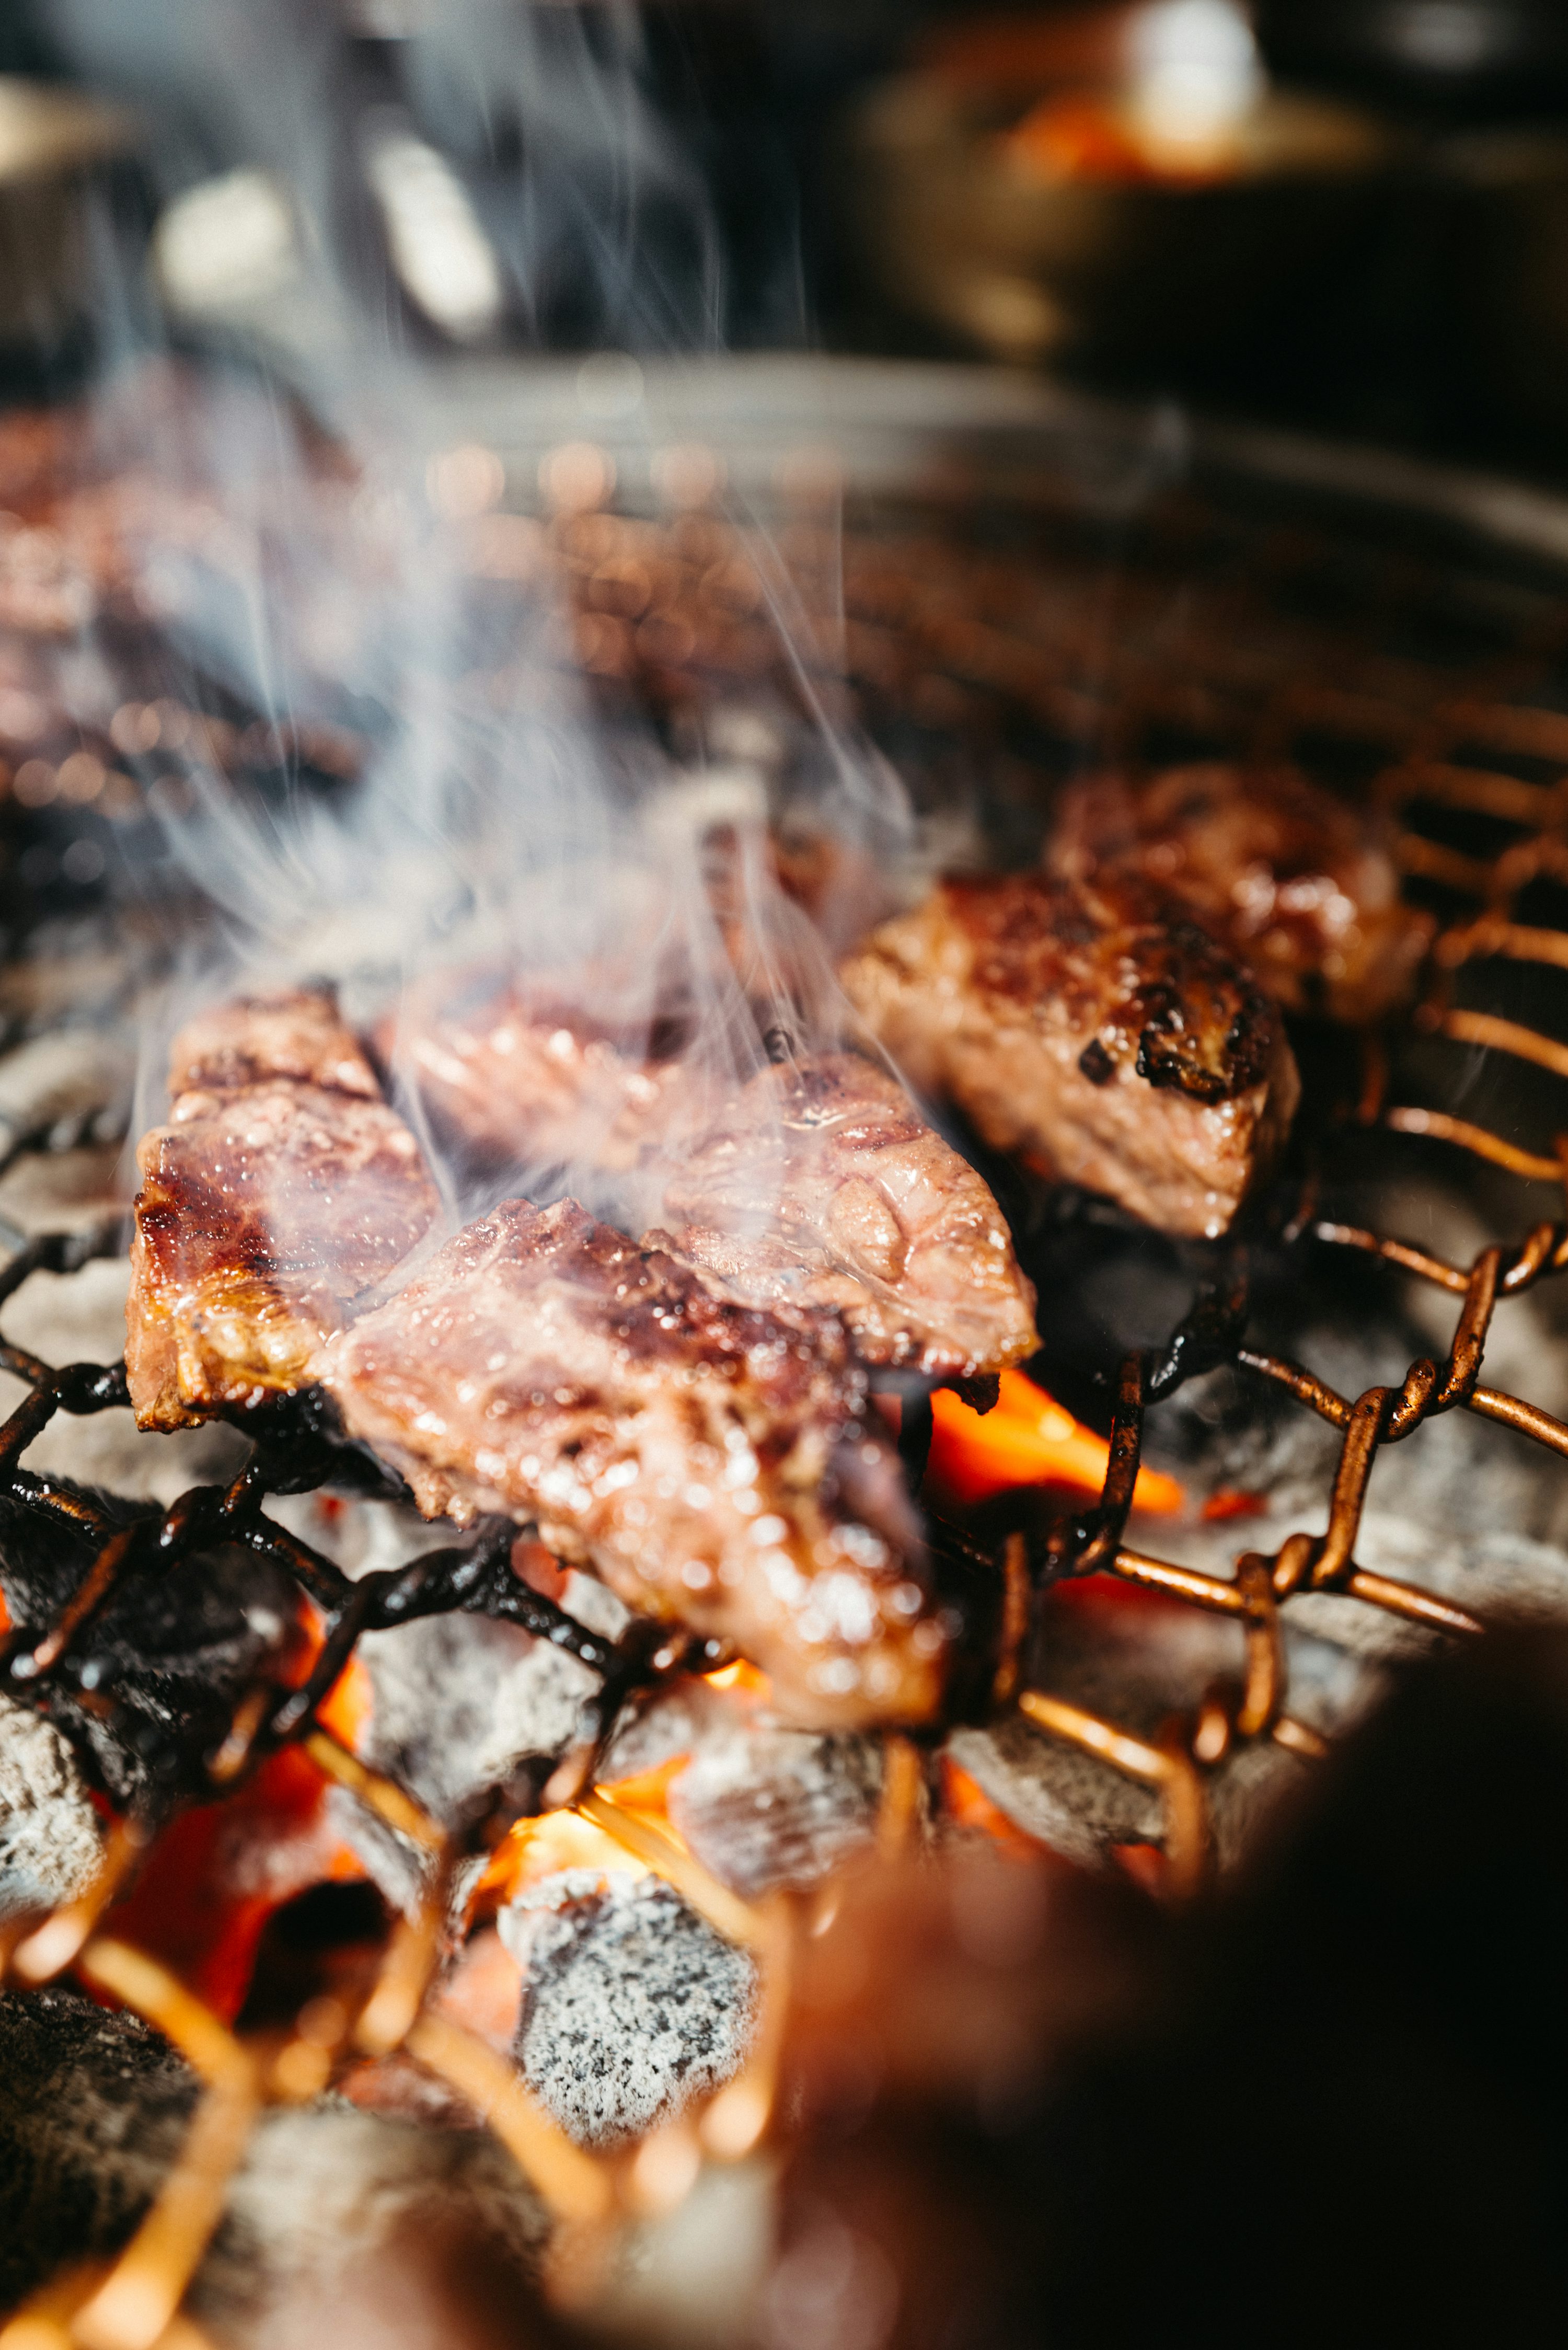
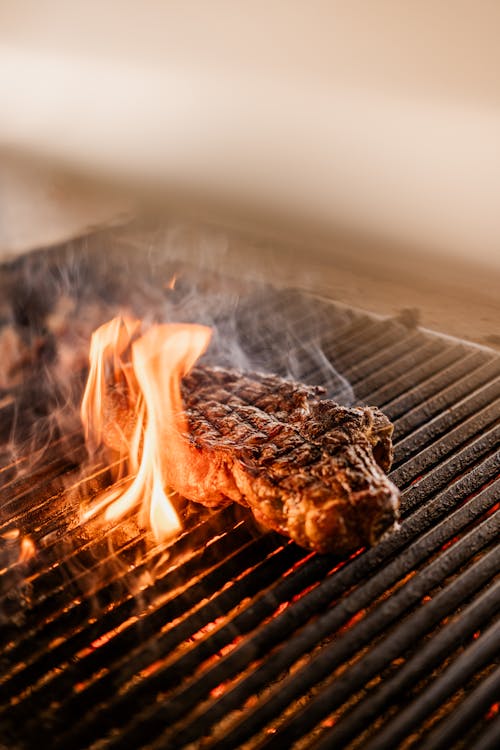
3. Sear over direct high heat
Prepare your grill for two-zone cooking. Light all burners or pile all charcoal on one side to create a hot zone (450°F–500°F) and leave the other side off for indirect heat. Place the steak directly over the flames. Sear for two minutes per side, turning only once, until a deep brown crust forms. Do not press down on the steak with a spatula; this squeezes out the juices you are trying to preserve.
4. Move to indirect heat to finish
Once the crust is set, move the steak to the cooler side of the grill. Close the lid to trap heat and let the gentle, ambient warmth cook the interior. This method, known as "finishing" the steak, allows the center to rise in temperature without further charring the outside. Use a meat thermometer to monitor progress.
5. Check internal temperature
Pull the steak when the internal temperature reaches 125°F (52°C) for medium-rare. The temperature will rise another 5°F as it rests. If you do not have a thermometer, press the center of the steak; it should feel like the fleshy part of your palm when your thumb and middle finger are touching. It should yield slightly but still have resistance.
6. Rest before slicing
Transfer the steak to a cutting board or warm plate. Tent it loosely with foil and let it rest for five minutes. Resting allows the muscle fibers to relax and reabsorb the juices. If you cut into it immediately, those juices will run out onto the board, leaving the meat dry. Slice against the grain and serve.
Cook juicy burgers without drying out
The biggest mistake people make with burgers is treating them like steaks. You don’t need to flip them constantly or press them flat. In fact, pressing down on a burger with a spatula is the fastest way to squeeze out the fat and leave you with a dry, crumbly patty. Think of the burger as a self-contained vessel of flavor; your job is to protect that moisture, not extract it.
Start by gently forming your patties. Overworking the meat packs the proteins tightly, which leads to a tough, rubbery texture. Handle the ground beef as little as possible. Shape them into discs slightly wider than your buns, since they will shrink as they cook.
Press a shallow indentation into the center of each patty with your thumb. As the meat heats up, the proteins contract and the patty tends to puff up in the middle, creating a meatball shape. The indent counteracts this shrinkage, keeping the burger flat and ensuring even cooking from edge to edge.
Season the outside of the patties generously with salt and pepper right before they hit the grill. Do not mix seasoning into the meat, as this can change the texture and make the burger dense. Let the seasoning sit on the surface to form a crust when it meets the hot grate.

Place the patties on the hot grill and leave them alone. Resist the urge to poke or press them. Let them develop a sear on the first side before flipping just once. This creates a flavorful crust while keeping the interior juicy. Cook until they reach your desired internal temperature.
Once the burgers are cooked, let them rest for a few minutes before serving. This allows the juices to redistribute throughout the meat rather than running out onto the plate the moment you bite into it. Serve immediately on toasted buns with your favorite toppings.
Roast a whole chicken on the grill
Cooking a whole chicken on the grill requires patience and a clear understanding of indirect heat. Unlike steaks or burgers that thrive over direct flames, a whole bird needs gentle, enveloping warmth to cook the breast meat through without charring the skin or drying out the legs. Think of your grill as an oven: you want to create a hot zone for searing and a cool zone for slow roasting.
Setup the two-zone fire
Start by arranging your charcoal or gas burners to create two distinct zones. If you are using charcoal, pile the hot coals on one side of the grill, leaving the other side empty. For gas grills, turn on only the burners on one side. This creates your indirect heat zone—the cooler side where the chicken will sit. The direct heat zone will be reserved for later if you need to crisp the skin or finish the bird quickly.
Prepare the bird for even cooking
A whole chicken has uneven thickness, with a thick breast and thinner legs. To ensure it cooks evenly, spatchcock it by removing the backbone with kitchen shears, or truss it tightly to compact the shape. This helps the breast and legs cook at roughly the same rate. Season the bird generously with salt, pepper, and your favorite herbs. Let it sit at room temperature for 30 minutes before grilling to take the chill off, which promotes more even cooking.
Place on the indirect heat zone
Place the chicken on the grill grate over the empty side (indirect zone), breast-side up. Close the lid. The closed lid traps heat and smoke, circulating it around the bird just like a convection oven. Maintain a grill temperature between 350°F and 375°F (175°C–190°C). Adjust your vents or burner knobs to keep the temperature steady. Avoid opening the lid frequently, as each opening causes significant heat loss and extends cooking time.
Monitor internal temperature
Use an instant-read thermometer to check for doneness. Insert the probe into the thickest part of the thigh, avoiding the bone. The chicken is safe to eat when the thigh reaches 165°F (74°C) and the breast reaches 160°F (71°C). The USDA recommends 165°F for all parts, but pulling the breast slightly early allows carryover cooking to finish it without drying out. If the skin is not crispy enough, move the chicken to the direct heat zone for a few minutes per side, watching closely to prevent burning.
Rest before carving
Once the chicken reaches the target temperature, remove it from the grill and transfer it to a cutting board. Tent it loosely with foil and let it rest for 15–20 minutes. This rest period allows the juices to redistribute throughout the meat. If you carve immediately, the juices will run out, leaving the meat dry. After resting, carve the chicken and serve.
Check doneness with a thermometer
Skipping a thermometer is the fastest way to ruin a good cut of meat. Visual cues like color or firmness are unreliable, especially for filets and burgers. An instant-read thermometer gives you a precise reading, ensuring your food is safe to eat without overcooking.
Use the following temperatures as your target:
Push the thermometer tip into the thickest part of the meat. For burgers and chicken breasts, insert it from the side to avoid piercing through the bottom. For filets, insert from the top directly into the center.
Hold the thermometer steady. Digital models usually beep when ready, but analog ones require you to watch the needle. Wait until the number stops rising or falling before you pull it out. This prevents underestimating the internal temperature.
For uneven cuts or large chicken pieces, check two or three spots. If one area is cooler than the target, the meat isn't done. Remove the meat from the heat as soon as it hits your target temperature to preserve juiciness.
Let the meat rest for a few minutes after removing it from the grill. The internal temperature will rise slightly (carryover cooking) while the juices redistribute. This final step ensures every bite is tender and flavorful.
Grilling prep checklist
Before you light the grill, gather your tools and ingredients. A clean grate prevents sticking, and having everything within reach keeps you from leaving the heat unattended. This grilling prep checklist covers the essentials for cooking filet mignon, burgers, and whole chicken without interruption.
Tools and Gear
- Grill brush and scraper: Clean the grates while they are hot to remove old residue.
- Tongs and spatula: Use long-handled tongs for the chicken and filet, and a sturdy spatula for burgers.
- Meat thermometer: Essential for checking internal temperatures without cutting into the meat.
- Aluminum foil: Wrap the chicken or hold burgers; useful for indirect heat zones.
- Grill oil and paper towels: Dip a folded towel in oil to lightly coat the grates before cooking.
Ingredients and Seasoning
- Filet mignon, burgers, and whole chicken: Ensure meats are brought to room temperature before grilling.
- Salt and pepper: Basic seasoning for all proteins.
- Olive oil or butter: For basting the chicken or finishing the steak.
- Wood chips (optional): Soak chips if you want to add smoke flavor to the charcoal or gas grill.
Common grilling mistakes to avoid
Good texture comes from matching the cooking cue to the food, not from trusting the timer alone. Check thickness, moisture, and doneness before changing the recipe.
-
Prep evenlyCut, roll, portion, or spread the mixture evenly so every piece cooks at the same pace.
-
Control moisturePat, drain, rest, or reduce wet ingredients when excess liquid would soften the final texture.
-
Use the doneness cueLook for the recipe-specific sign of doneness instead of stopping at the first browned edge.
-
Let it settleCool or rest the finished food long enough for steam and structure to stabilize.
No comments yet. Be the first to share your thoughts!