A clean, properly heated grill prevents sticking and ensures distinct char marks. Establish a reliable heat source and non-stick surface before seasoning protein.
Open all vents and ignite the grill. For charcoal, arrange coals for two zones: hot direct heat for searing, cooler indirect for finishing. For gas, turn all burners to high and close the lid. Run for 15–20 minutes until the grate reaches at least 450°F (230°C). This intense heat sears the exterior quickly, locking in juices.
While heating, clean the grates with a stiff wire brush to remove debris. Once hot, use tongs to hold a folded paper towel soaked in high-smoke-point oil (canola or grapeseed). Rub the towel across the grates to create a protective, non-stick layer.
1
Open vents and ignite
Open all air vents. For charcoal, light the chimney starter. For gas, turn knobs to high. Close the lid to trap heat.
2
Wait for full preheat
Let the grill run on high for 15–20 minutes. Check grate temperature with an infrared thermometer; it should be at least 450°F (230°C).
3
Brush and oil the grates
Scrub hot grates clean with a wire brush. Then, dip a folded paper towel in oil, hold it with tongs, and wipe the grates to create a non-stick surface.
Grill burgers to juicy perfection
Grilling burgers requires precise timing for a crisp crust and pink interior. Pressing patties squeezes out juices, resulting in dry meat. Follow this sequence for a proper sear and rest.
1
Form patties with a dimple
Divide ground beef into 4–6 oz portions. Shape gently without packing tightly. Press a shallow indentation into the center with your thumb to counteract puffing, ensuring a flat, even burger.
2
Sear over high heat
Preheat grill to 450–500°F. Oil grates lightly. Place patties over flames and do not move for 3 minutes to form a deep brown crust. If they stick, they aren't ready to flip.
3
Flip only once
Flip each burger just once after the crust forms. Use a spatula to check for dark brown sear. Multiple flips steam the meat. Cook the second side for 3–4 minutes.
4
Add cheese and rest
Add cheese slices in the last minute. Close the lid to melt cheese. Remove when internal temperature reaches 160°F for ground beef. Rest for 5 minutes to redistribute juices.
Sear and finish filet mignon
Thick cuts like filet mignon need a two-zone fire to achieve a proper crust without overcooking the center. This method keeps lean meat juicy and tender.
Build the two-zone fire
Arrange charcoal or gas burners to create distinct heat areas. For charcoal, pile hot coals on one side. For gas, turn all burners to high, then turn off one side once the grill reaches temperature. The active side should be 450–500°F; the inactive side 300–350°F.
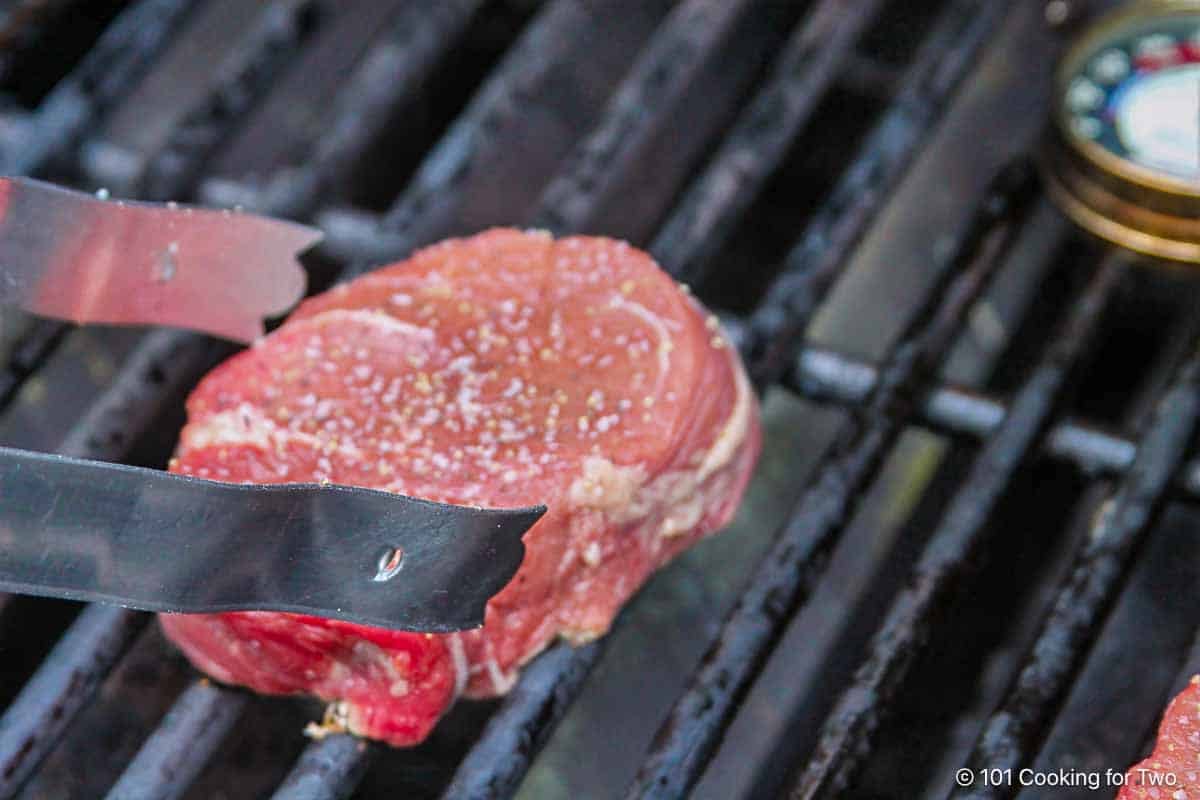
Sear for the crust
Pat the filet dry and season with salt and pepper. Place the steak directly over the hot zone. Do not move it for 2 minutes to allow the Maillard reaction to create a dark brown crust. Flip and sear the other side for 2 minutes. Sear edges by holding with tongs for 30 seconds per side. Move to the cool zone once the crust is set.
Finish with indirect heat
Move the filet to the cooler zone. Close the lid to create an oven-like environment. Monitor internal temperature with a meat thermometer. For medium-rare, pull the steak at 125°F (52°C). This takes 10–15 minutes depending on thickness.
Rest before serving
Transfer the filet to a cutting board and tent loosely with foil. Rest for at least 5 minutes to allow juices to redistribute. Internal temperature will rise slightly to 130–135°F. Slice against the grain and serve.
1
Build the two-zone fire
Pile charcoal on one side or turn off half the gas burners. Create a hot zone (450–500°F) and a cool zone (300–350°F).
2
Sear for the crust
Place the dry, seasoned filet over the hot zone. Sear undisturbed for 2 minutes per side, then sear the edges. Move to the cool zone once the crust forms.
3
Finish with indirect heat
Close the lid and cook over the cooler zone until the internal temperature reaches 125°F for medium-rare. This usually takes 10–15 minutes.
4
Rest before serving
Tent with foil and let the steak rest for 5 minutes. This redistributes juices and allows the temperature to stabilize before slicing.
Roast a whole chicken on the grill
Indirect heat turns your grill into an oven, cooking a whole chicken evenly without charring the skin prematurely. This method yields juicy meat and crisp skin.
1
Prep and season the bird
Pat the chicken dry with paper towels. Moisture prevents crisp skin. Rub with oil, salt, and spices. Truss legs or spatchcock (remove backbone) for faster, more even cooking.
2
Set up for indirect heat
Light charcoal or turn on gas burners. For charcoal, pile coals to one side. For gas, turn on outer burners, leaving the center off. Place a drip pan in the center gap to catch fat.
3
Roast with the lid closed
Place the chicken on the grill grates over the unlit burners or away from coals. Close the lid immediately to trap heat. Do not open the lid frequently to maintain temperature.
4
Check internal temperature
Use a meat thermometer to check the thickest part of the thigh, avoiding bone. Chicken is safe at 165°F (74°C). If the breast cooks faster, move the bird toward the cooler side.
5
Rest before carving
Remove the chicken and place it on a cutting board. Tent loosely with foil and rest for 10–15 minutes. This redistributes juices for moist, tender meat.
Common grilling mistakes to avoid
Small adjustments in technique prevent tough, dry meat. Focus on these frequent errors and how to fix them.
Pressing down on burgers
Pressing a burger patty squeezes out flavorful juices into the fire. Let the heat render the fat naturally. Flip only once and resist squishing the meat.
Flipping too often
Frequent flipping stops the Maillard reaction, preventing a rich, savory crust. Let the protein sit undisturbed until it releases naturally, then flip once to finish.
Skipping the rest
Cutting meat immediately causes juices to spill out. Resting allows muscle fibers to relax and reabsorb liquids. Let steaks rest for 5 minutes; larger roasts for 10–15 minutes.
1
Avoid pressing burgers
Do not press down on the patty. Let the fat render naturally to keep the burger juicy and flavorful.
2
Flip only once
Resist the urge to move the meat. Let it sear undisturbed to develop a proper crust before flipping.
3
Let the meat rest
Remove the meat from the grill and let it sit for 5-10 minutes before slicing to retain internal juices.
Grill Safety and Cleanup Tips
Safe grilling involves strict hygiene and equipment maintenance to prevent foodborne illness and ensure longevity.
1
Prep and handle safely
Keep raw meat separate from ready-to-eat foods. Wash hands thoroughly. Use separate cutting boards and utensils to avoid cross-contamination. Never place cooked food on plates that held raw meat.
2
Monitor internal temperatures
Visual cues are unreliable. Use a calibrated instant-read thermometer. Poultry must reach 165°F (74°C); ground meats 160°F (71°C). Remove meat slightly before target temp as it rises during resting.
3
Clean grates while warm
Brush grates with a stiff grill brush while hot to remove residue. For gas grills, turn burners to high for 15 minutes to burn off debris, then brush again. This prevents flare-ups and off-flavors.
4
Store fuel and gear properly
For gas grills, close the propane tank valve and disconnect the tank after use. Store the tank outdoors in a well-ventilated area. Cover the grill body to protect from rain and debris.
Frequently asked: what to check next
Grilled meat is generally safe for diabetics. Choose lean cuts like chicken breast or fish, avoid charring, and keep grilling temperatures moderate. Pair with non-starchy vegetables for a balanced meal.
Many grilled proteins are IBS-friendly when prepared simply. Chicken breasts, turkey, pork chops, and firm fish provide excellent protein. Avoid high-FODMAP marinades, garlic, or onion-based rubs.
The 7-6-5 method is for pork tenderloin. Cook for seven minutes on the first side, six minutes on the second side, then turn off burners and close the lid for five minutes to finish cooking through using residual heat.


No comments yet. Be the first to share your thoughts!